This website contains digital assessment information for lecturers using the Remindo application.
Lecturers: Digital assessments at the University of Twente are supported by the examinations office, LISA and CES. Lecturers who are interested in getting started should follow the following steps:
- Review the examinations office website. This contains important information about the requirements for digital testing.
- Browse the website below for instructions on using Remindo.
Remindo user session
We’d like to invite Remindo users to a feedback session on Remindo.
📅 When: Tuesday, July 15th
🕧 Time: 12:30 – 14:00
📍 Where: Location to be determined (hybrid session with MS Teams)
👥 Who’s joining: Representatives from Remindo will be present
This session is your chance to share your experiences, thoughts, and suggestions directly with us and the Remindo team. To help us prepare and make the session as focused as possible, please let us know if you'll be able to participate, or if you will just send in your feedback beforehand:
We look forward to hearing your insights!
Remindo instructions
If you are new to Remindo, you may want to start by taking the practice test. This test demonstrates the possible question types.
The instructions for Remindo are grouped per subject in the assessment cycle:
1. Design
The digital test application used at the University of Twente is Remindo. If lecturers want to get started digital testing, they can contact the examinations office at e-assessment-ces@utwente.nl. The e-assessment team will contact you to discuss options in Remindo. The website of the e-assessment team contains information about how to schedule the exam and which steps you need to take prepare.
The examinations office will also give you access to the application. Remindo consists of two parts:
2. Compose
Once the e-assessment team has given you access to Remindo, you can enter questions into Remindo toetsmanager.
- Question bank structure
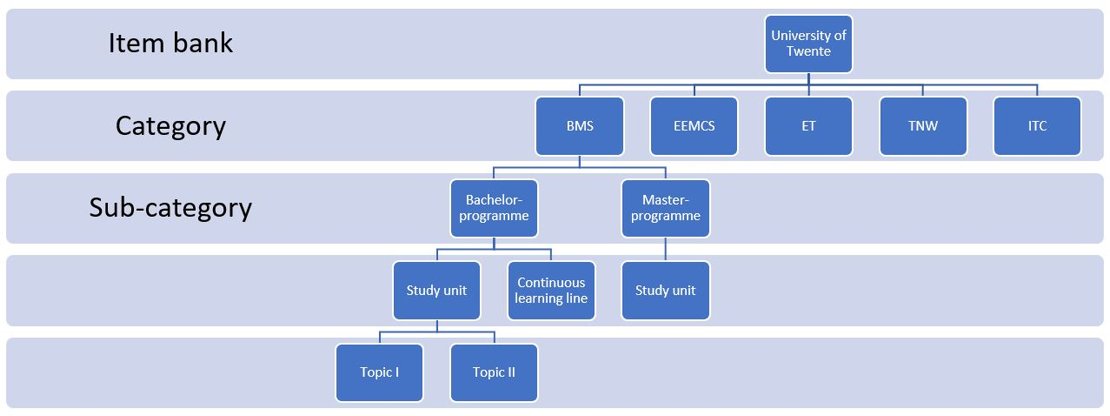
In Remindo there is one item bank / question bank: UTwente - University of Twente. This item bank is divided into categories and sub-categories, following the structure below.
Questions can be added to the item bank, for more information about adding questions to the item bank see 'Adding questions'. It is possible to get access to a specific part of the item bank, please contact the e-assessment team (e-assessment-ces@utwente.nl).
- Adding questions
Please click on the topics below to learn about manually adding questions:
- Information about the 'Question page'
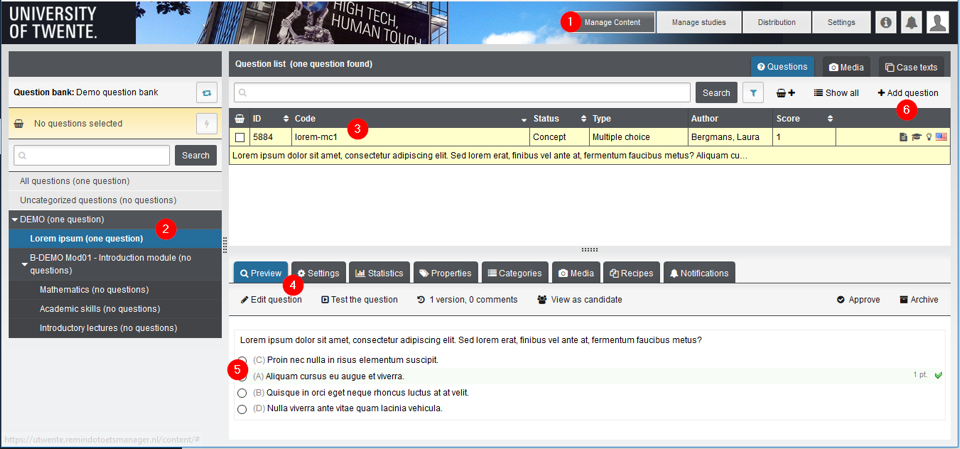
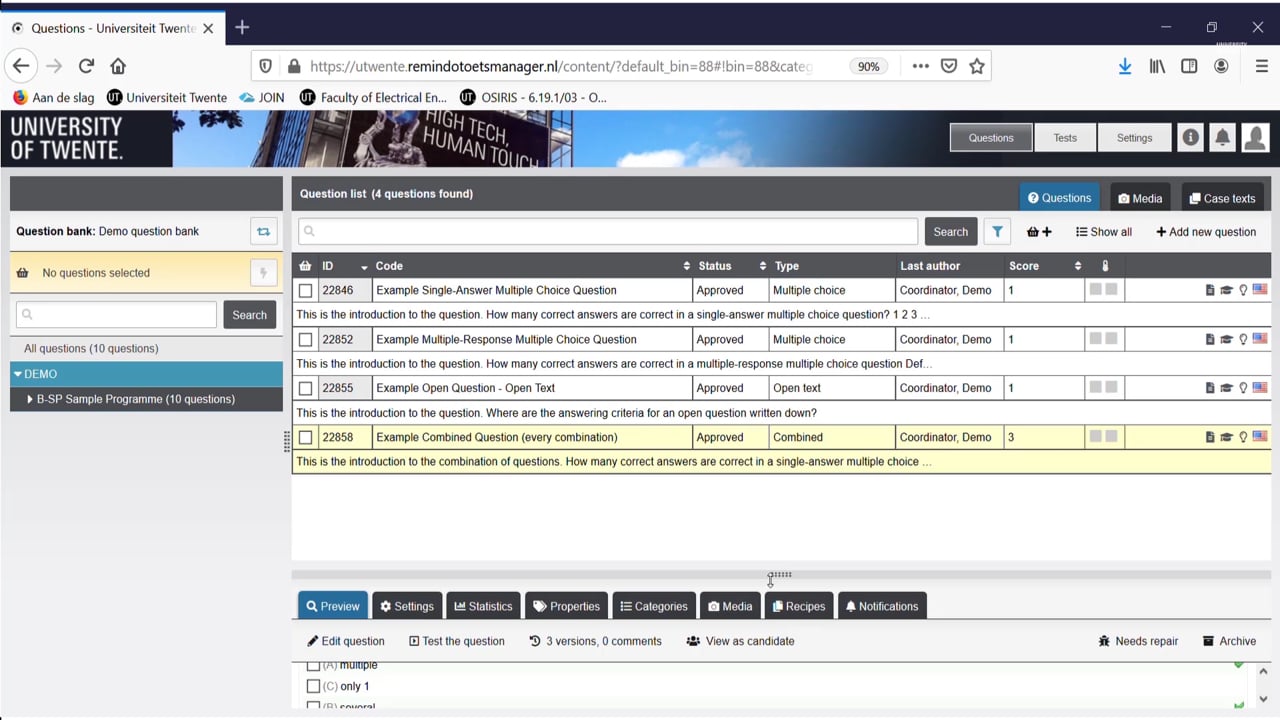
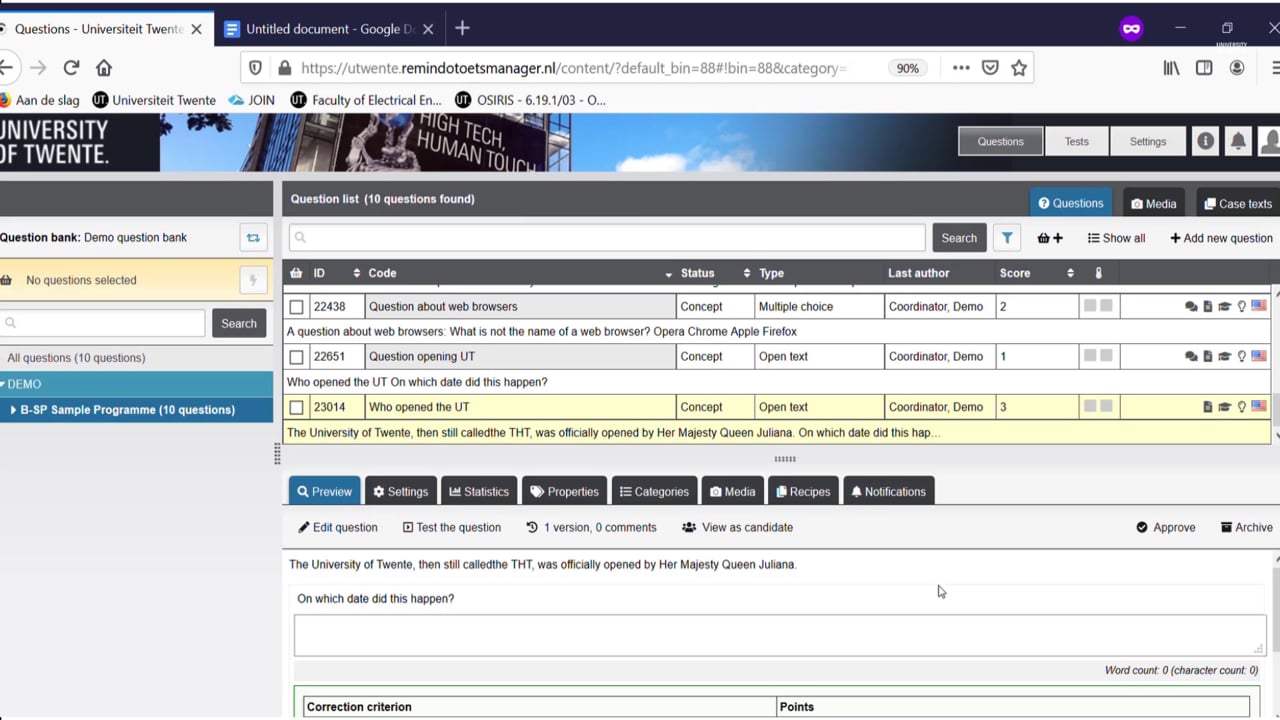
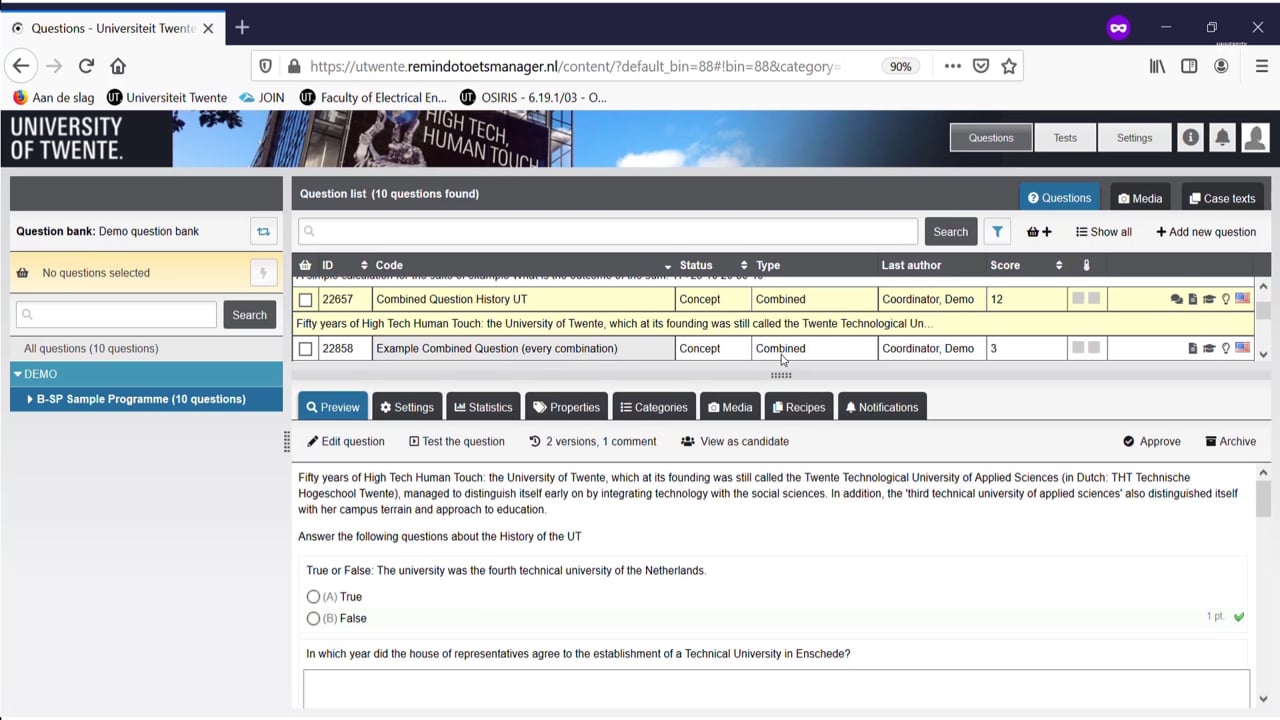
Open Remindo (utwente.remindotoetsmanager.nl) and click on 'Questions', you will see a page with a part of the item bank. The red numbers in the screenshot of this page are explained below:
- Questions is the button to open the item bank
- Structure of item bank: For information about the structure of the item bank, see the Question bank structure above. Further data about the question is added through categories and properties. See the Using 'Question properties' section below.
- Questions: Each question is shown in a two-line display that contains all the key details at a glance (ID, code, status, etc.). Please note: the question code is displayed in various reports (see for example our instructions for analysis and reporting), so we recommend entering a recognizable code for each question.
- Question details: The bottom half of the screen contains all the question details and buttons / tabs where you can edit the question and meta data.
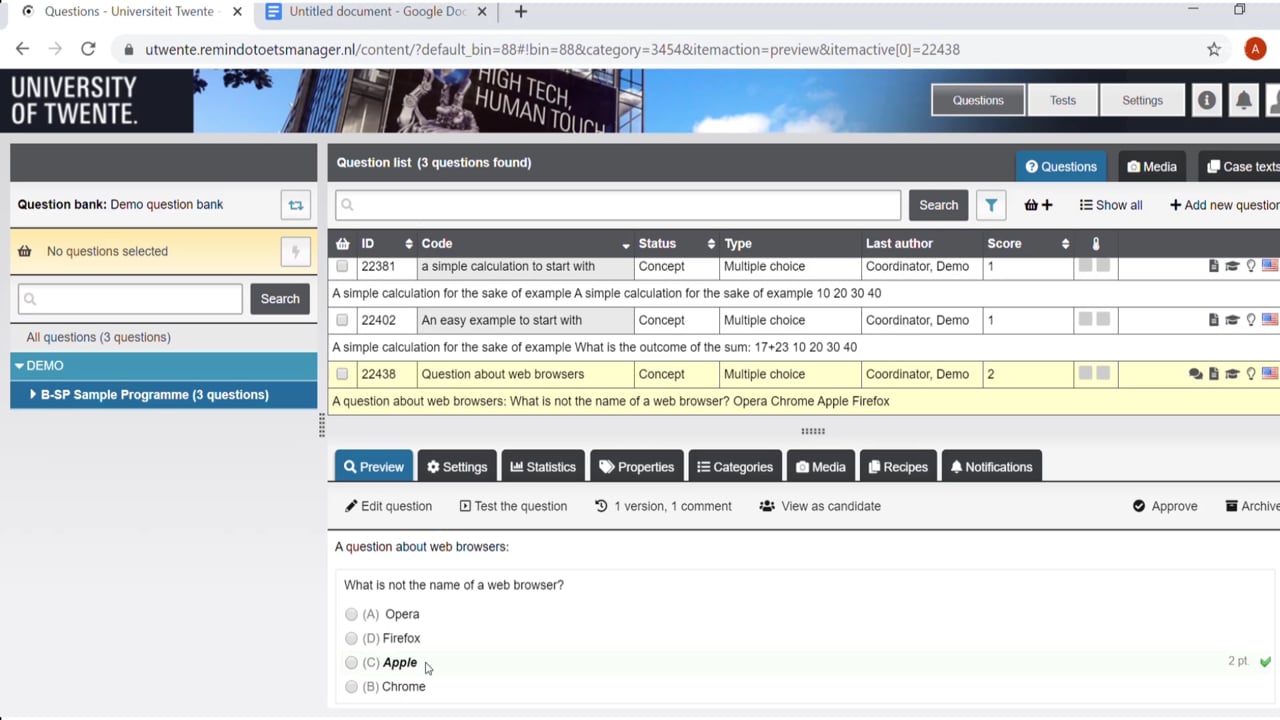
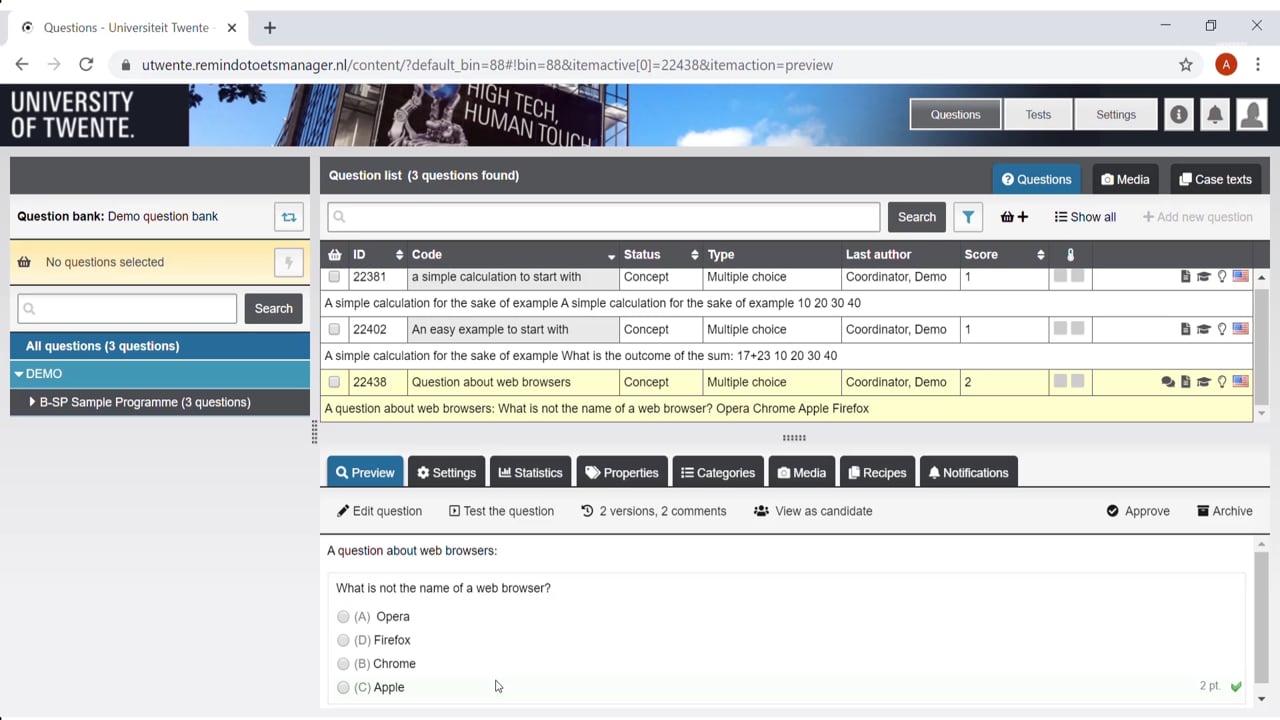
- Correct answer: The correct answer is highlighted in green. The fact that the answers are not in alphabetical order indicates that this question will be randomized in the exam.
- Add new questions: To add a new question, click Add question.
- Adding questions - step by step instructions
To add a new question, click on 'Add question'. You will see the following pop up screen (the red numbers are explained below):

1. Type of question: choose the question type. For more information about different question types in Remindo, see our practice test.
2. Code: enter a recognizable code for each question. The question code is displayed in various reports.
3. Available for use in paper exams: There is a 'print & scan' function in Remindo. When a question is available for use in paper exams, the question can also been used in the 'print & scan' functionality.
4. Available for practices and graded practices (formative)
5. Available for exams (summative)
6. Language: Select the language of the question
7. Calculator available: It is possible to select per question the availablity of a calculator (simple or scientific calculator)
Click on 'add'. In the following screen the question can be entered and the options can be set (the red numbers are explained below):
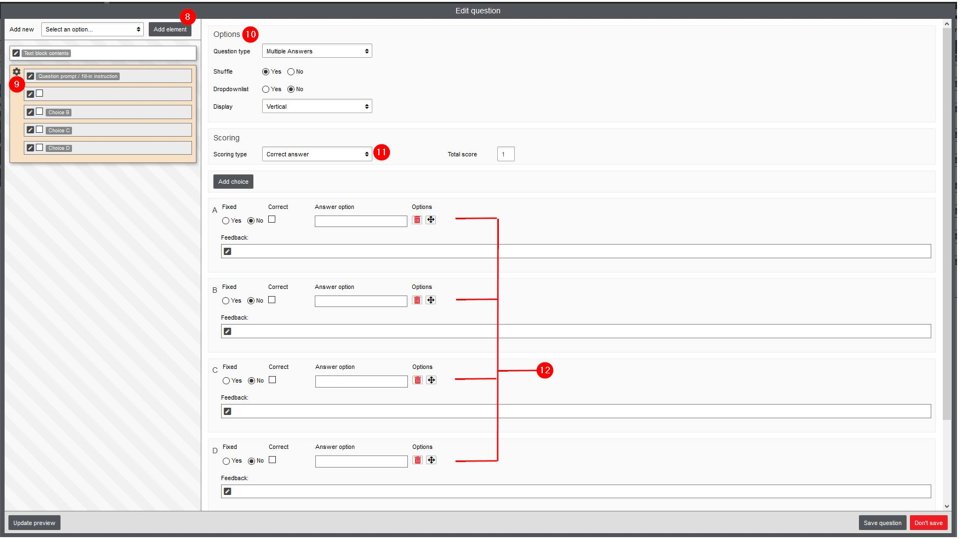
8. Add element: It is possible to add specific elements to the question.
For example: Add the element 'Case text block', to (re-)use or create a case in the question. Once a case-text is created in Remindo, it is possible to use these case in several questions.
Or compose a combined question, by adding another question type.
9. Edit question options: On the right side of the screen, you can edit the options.
By thicking the pencil, you can edit the question text or text in answer options.
10. Options: In the top section you can indicate whether the question has only one correct answer or multiple. You can also choose whether to shuffle (randomize) the answers. They will then be shown in a different order for each student.
11. Scoring type: specify the scoring of the question. There are several types of scoring possible. For example score mapping, add different points (or negative points) per answer alternative.
For open questions an answer model (correction model) can be used. It is possible to specify the number of points per correction criteria.
12. Answer options: The correct answer alternative is checked here. If you enter 'fixed' for an individual answer, only that one will be fixed in that order while the rest is randomized.
Feedback can be entered for each answer option or for correct/incorrect answers. This is generally used for formative (practice) tests.
When the quesion is entered and the options are set, click on 'Save question'.
- Worksheet questions
In Remindo, students can be asked to enter their answers into a worksheet. This looks like a basic Excel sheet. Useful features:
- The lecturer can prefill some cells, and these cannot be edited by the students
- The range of cells where student input is expected is coloured yellow
- For each cell, you can indicate the expected value
- It is also possible to add more advanced options, such as searching for a particular answer anywhere in the row/column
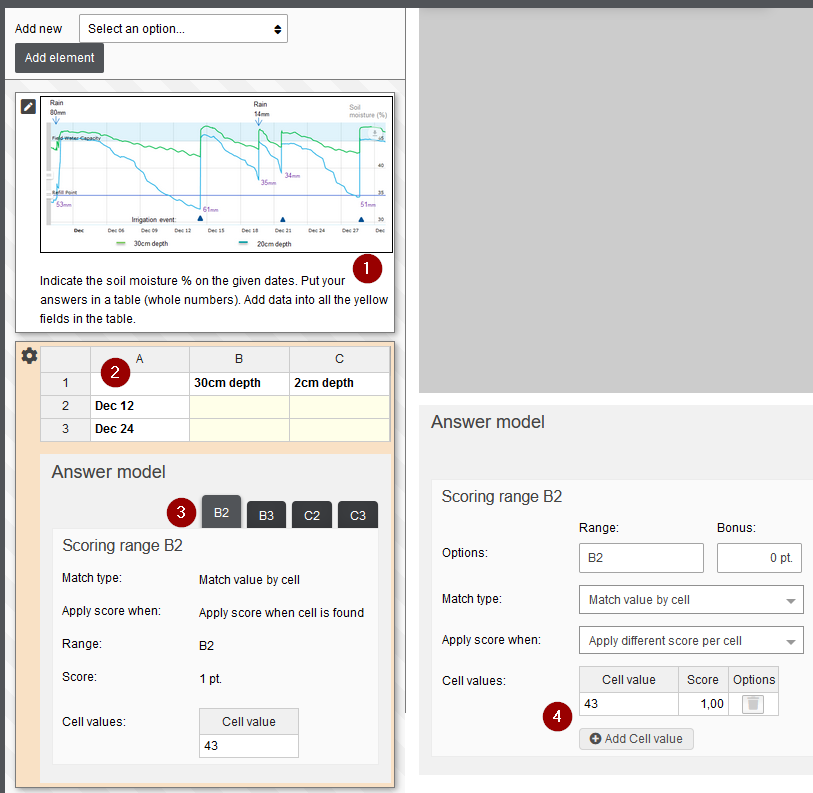
In the screenshot below, you will see a basic worksheet question:
- In the question header you can include instructions, images etc.
- You define the table with the number of rows/columns, and fill out the headers (and any other cells you need). Only the yellow cells are open to student input.
- In the answer model, answers are defined for cells B2 - C3.
- In cell B2, students have to fill out '43' as the answer. If you want to allow more answer options, you can use the button 'Add Cell value' to specify additional options. The answer can also be text.
- Using a case text
It is possible to use case text in a question. Once a case text is created in Remindo, it is possible to use this case in several questions.
To add a case text to a question (edit an existing question or add a new question):
1. Add the element 'Case text block' to the question.

2a. To create a new case text in Remindo, click on Create new case text. Name the case text and click on save. You can now write (or paste) the case text. Once a case text is created in Remindo, it is possible to use this case in several questions (see 2b).
2b. To re-use a case text, click on the plus sign at the end of the row (Pick case text). The case text is now added to the question. If you want to preview the case text, select the specific case.

Instruction videos: 'Adding questions'
Several short instruction videos are available to lecturers who are learning to use Remindo.
- Overview of question types
- Adding a single multiple choice question
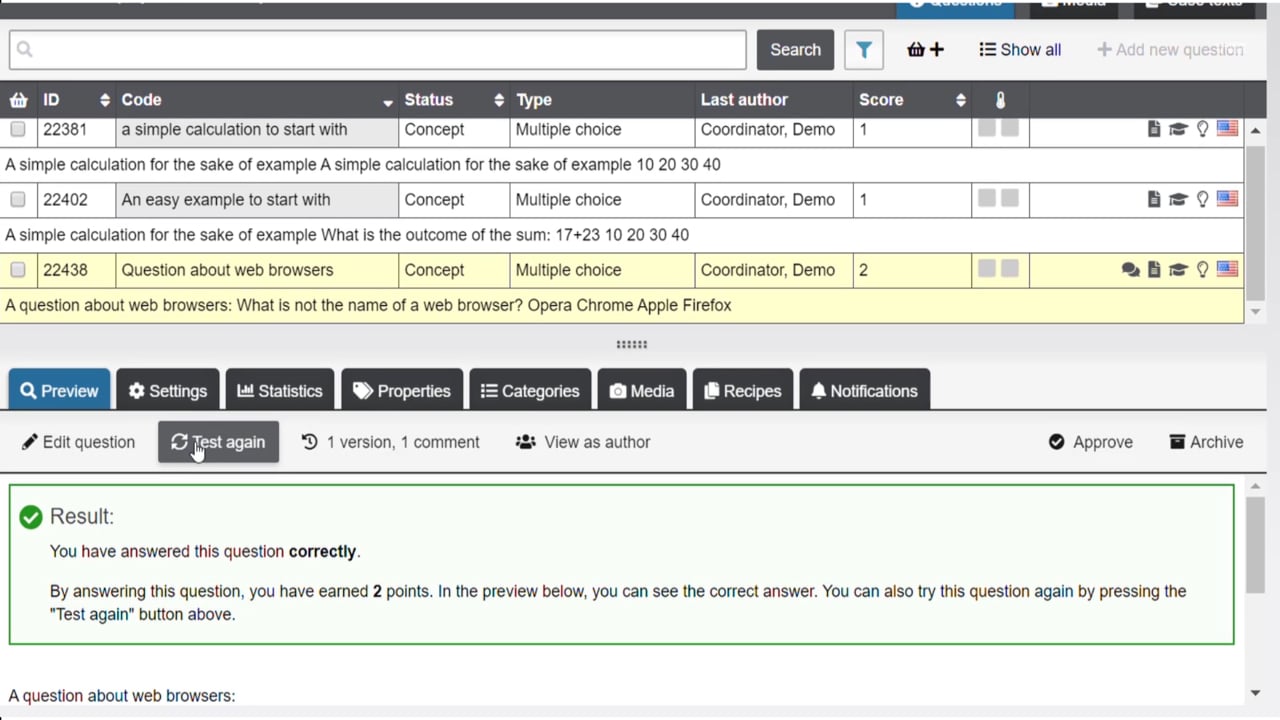
- Testing a multiple choice question
- Editing a multiple choice question
- Adding an open question
- Adding a combined question
- Approving a set of questions

- Bulk actions
There are various actions you can apply to multiple questions at once.
Instruction video: Approve a series of questions:

Bulk Actions stepwise:
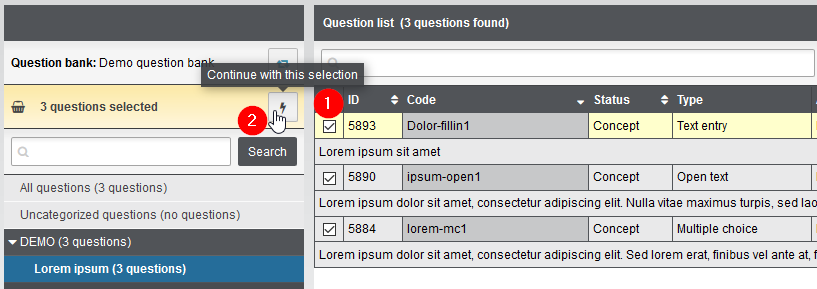
There are various actions you can apply to multiple questions at once. To do so:

1. Select: Select the questions you want to edit;
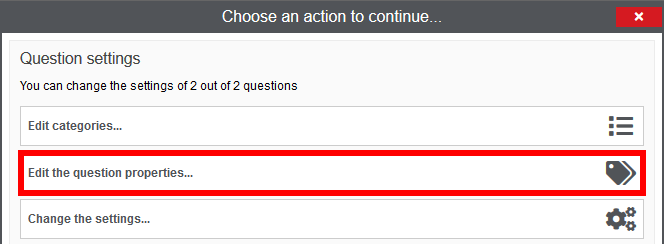
2. 'Lightning bolt' icon: Click the 'lightning bolt' icon. The following screen will pop-up:

3. Question settings: You can edit the question settings of the selected questions at once, e.g. change the (sub-)category of the questions in the item bank.
More information about editing question properties is described in the topic Using 'Question properties'.
4. Question status: You can edit the question status of the selected questions at once. When you want to use a question in a test, the status of this question has to be 'approved'.
Please note: when you have finished applying changes, you need to click
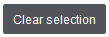 to clear the selection. If you forget this step, they will remain selected and your next set of changes will also be applied to them.
 - Using 'Question properties'
The action 'Edit question properties' can apply to multiple questions at once. To do so:
1. Select: Select the questions you want to edit;
2. 'Lightning bolt' icon: Click the 'lightning bolt' icon.
There are several predefined properties that help categorize where a question will be used:
BSc module
A list of bachelor programmes (e.g. B-PSY)
Course quartile + opportunity
Academic year, quartile and opportunity (e.g. 2020-2021 1A opportunity 1)
Exam type
Exam, resit, partial exam
MSc course
A list of master programmes (e.g. M-BME)
If you want to mark the questions used in a particular exam, you can set values for programme, quartile and exam type. These can then be used to create the exam, and to filter out this question for future (re)use.
NOTE: when you have finished applying changes, you need to click
 to clear the selection. If you forget this step, they will remain selected and your next set of changes will also be applied to them.
 - Creating a test recipe
A test matrix in Remindo is called a 'recipe'. A basic recipe is just a list of questions in a fixed or random order. Remindo also offers advanced features, such as dividing the recipe into sections that are graded by different people, or defining question groups from which a random subset of questions is generated for each student. These features are explained below.
- Information about the 'Recipe' page
When you open a test matrix ('recipe' in Remindo) as created by the exam office, you will see a screen that looks something like this:
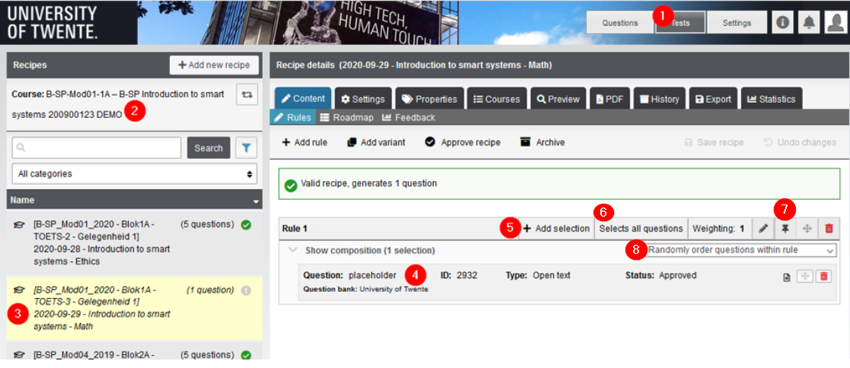
- Tests: You open a recipe from the Tests menu;
- Course: Choose the appropriate course;
- Name of recipe: The exam office always includes the exam date in the recipe name, as well as the course name and additional details;
- 'Rule': Each recipe contains a rule with only a placeholder question;
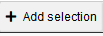
- Add questions: To start adding questions, click Add selection.
- Selects questions: All the questions which are added to the rule are selected. You can use this feature to randomize exams (for more information: 'Adding questions to a recipe - Randomization').
- Randomization per rule - Pin or Unpin the rule: When more than one rule is used they can be randomized by 'pinning' or 'unipinning'. When a rule is 'pinned' (in the screenshot) the rules will be assigned to students in the given order (for more information: 'Adding questions to a recipe - Randomization').
- Randomisation within or across a rule: The question order can be randomized within or across the rule(s) (for more information: 'Adding questions to a recipe - Randomization').
- Adding questions to a recipe
The process for adding questions to a recipe is explained in the video below.
Don't forget to save the recipe and to click 'Approve recipe' at the top. Only approved recipes can be scheduled in Remindo. If you want to preview the recipe, please see our Previewing an exam page.
- Assigning questions for grading
The exam office only can assign grading per rule. If different open questions need to be graded by different people, please group their questions in a rule per lecturer and add their name as a description. Then, the lecturer will only see their own questions for grading.
A rule can also be assigned as 'divide grading across multiple people' in the case of large exam.

- Randomizing exams
There are various possibilities to randomize an exam in Remindo. The screenshot below demonstrates some of the options for organizing an exam recipe.
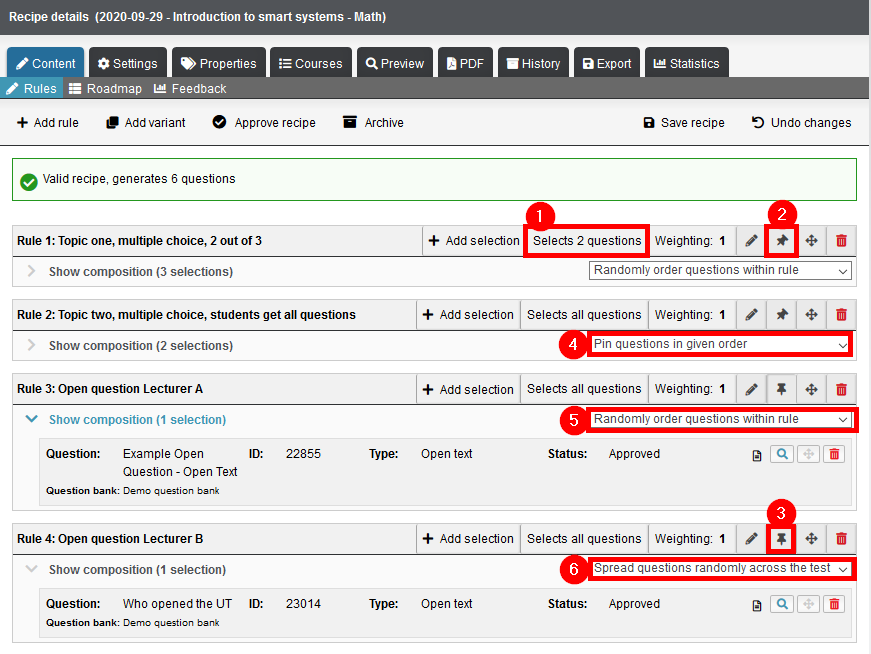 1. Select a number of questions from a rule: The first rule contains three questions, but each student will be randomly assigned two out of three questions (the menu displays 'Selects 2 questions'). This works well with larger item banks where you can generate unique exams per student.
The question order can be randomized at two levels:
Per rule:
2. Unpin the rule: When the rule has been 'unpinned' (pushpin icon), this rule will be randomly spread across the exam. The questions within these rule would be offered in this specific 'group' of questions (according to the setting 'Randomly order questions within rule').
3. Pin the rule: When the rule has been 'pinned' (pushpin icon), this rule will be offered at this order in the exam for all the students. The question in rule 4 will be the last question of the exam for all students.
Within a rule:
Within a rule, there are 3 settings possible to set the order of the questions:
4. Pin questions in given order: The questions will go to students in the order that is equal to the order you see in the recipe.
5. Randomly order questions within the rule: The questions of this rule will go to the students in a random order.
Please note: the questions of this rule still go to students as a group of questions.
6. Spread questions randomly across the test: The questions of this rule will be spread randomly across the test. So the questions will not go to students as a group of questions.
- Filter questions by properties
It is possible to select a number of questions to a rule at once. You can use the filter function in Remindo to filter by various properties.
1. Please go to the test recipe you want to add questions to (on utwente.remindotoetsmanager.nl - tests)
2. Click in a specific rule on
3. Use the filter
 to specify the questions
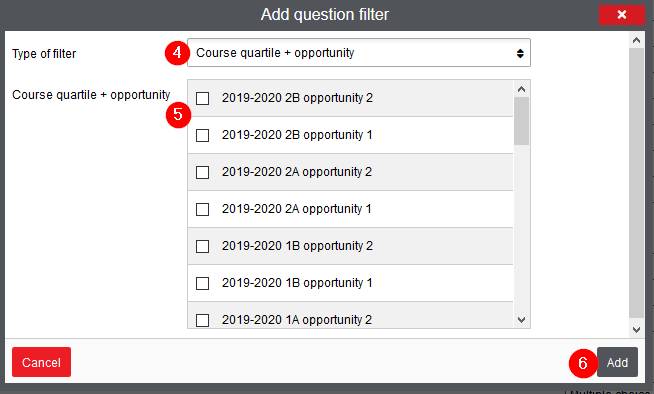
4. Choose the type of filter, e.g. question property 'Course quartile + opportunity'
5. Select one or more properties
6. Click on 'Add', the list of questions is filtered now on the selected properties. The properties you filtered for will appear under the search bar.
By checking the checkboxes you can select one or more questions from the filtered results.
- Instruction video: Adding questions to a recipe

3. Review and perform exam
After adding questions to Remindo and a test recipe, it is possible to generate a preview of the total exam. The exam is scheduled in Remindo on the agreed date and time. Candidates will be linked to the exam in Remindo, corresponding to their registration on the course in Osiris.
- Preview the exam
There are two ways to preview the exam in Remindo:
- Test the exam in Remindo from student perspective
To test the exam from student perspective, please follow the steps below:
1. Go to https://utwente.remindotoets.nl, log in with SURF-conext;
2. Click on
 ;
;3. Select the course of the exam, at the left side of the page;
4. Select the exam you want to test. Click the magnifying glass icon to go to the test recipe details;

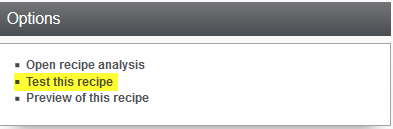
5. On the left of the page, click on 'Test this recipe' in the menu Options;
6. Now, you can make the exam from student perspective.
- Preview the exam in Remindo (including scoring criteria and number of points)
In the Preview you will see additional information about the test recipe in Remindo, such as the number of points, correct answers and correction criteria. Please follow the steps below to generate a preview of the exam in Remindo:
1. Go to https://utwente.remindotoets.nl, log in with SURF-conext;
2. Click on
 ;
;3. Select the course of the exam, at the left side of the page;
4. Select the exam you want to test. Click the magnifying glass icon to go to the test recipe details;

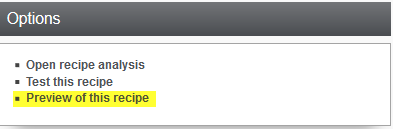
5. On the left of the page, click on 'Preview of this recipe in the menu Options;
6. Now, you will see the detailed information of the exam.
You can still make some changes in the exam questions until the start time of the exam. Click on
 to see the changes reflected immediately. For more information about editing questions, see 'Adding questions manually'
 Please note: Changes in exam questions are made in the other environment of Remindo: https://utwente.remindotoetsmanager.nl.
- Day of the exam (on campus)
On campus exams are scheduled primarily in the Therm hall. There is an alternative location in Noordhorst 115, 124 and/or 209 (subject to availability). Please make sure the exam is scheduled at one of these locations well in advance.
The digital testing page contains information about procedures and deadlines for scheduling a digital assessment. If you have any questions, you can also email e-assessment-ces@utwente.nl.

4. Grading
After students finished their exam, the results can be checked. Information about grading in Remindo is split into open and closed questions.
- Open questions
Open questions of an exam can be assigned into different correctors for grading. The exam office will set up the correction round.
Once the correction round has been set and students have submitted their work, correctors can start grading. A corrector can see the assigned correction work in Remindo Toets (log in by SURF-conext), in Results - Check answers.
NOTE: The exam office can only assign grading per rule, so group the questions per lecturer when you create the exam. More information about creating a recipe: Creating an exam recipe - Assign questions for grading.
This instruction page covers the following information about grading open questions in Remindo:
- Grading interface
A corrector can see the assigned correction work in Remindo Toets (log in by SURF-conext).
Follow the steps below to check open questions in Remindo. Once all the open questions are checked, the grades will be calculated automatically:
1. Click in the top right corner on Results - Check answers.
2. Select to check for a Test moment.
3. Select the right test moment. Use the filter option to select an specific test moment.
4. To the right of the (filtered) recipe, the number of students with open correction work assigned to you is shown.
5. Using these buttons, you can choose to check all questions per student
 , or to check answers per question
You can use the tabs View correction work and Check answers to switch between correction methods.

6. By clicking
 you will start checking the answers of the selected student or question.
7. Per question (and per student) you will see the scoring criteria at the right of the page. By using '+' and '-' buttons next to the score, you can enter the score for that specific criterium.
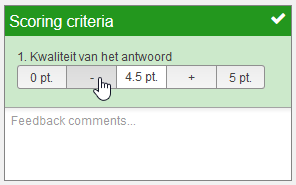
TIP: You can also typ in the field in the middle for a custom grade.
Once all the scoring criteria of a question have been evaluated, the total score of that question will be shown.

It is possible to change the scoring criteria, see 'Changing grading criteria' for more information.
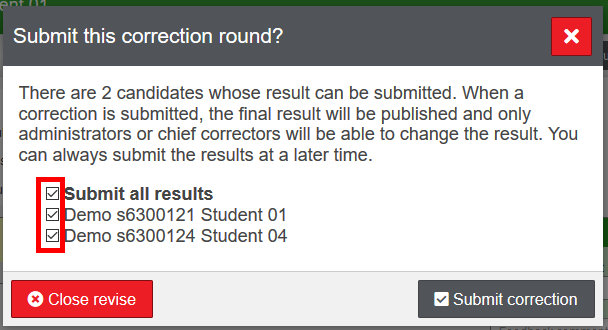
8. At the end of grading, grades need to be submitted. Use the check boxes to select the results of the correction round and click Submit correction.
- Change grading criteria
To check the open questions, it is possible to set correction criteria in Remindo. If necessary, these correction criteria or score per correction criterium can be changed after the test moment.
Follow the steps below to change the correction criteria, after the test moment:
1. Log in on Remindo toets, use SURF-conext.
2. Go to Results - Analysis, click the tab for Test-moment.
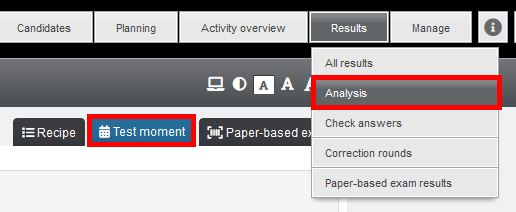
3. Select the right Test-moment. Use the filter option to select an specific test moment.
4. On the analyse-page at the tab Analyze items, you can click the 'Interaction analyse' icon
 next to an specific item to open the interaction analysis of that item.
5. Click on
 to add or edit a correction criterium for that specific item. The following screen will open, the red numbers are explained below.
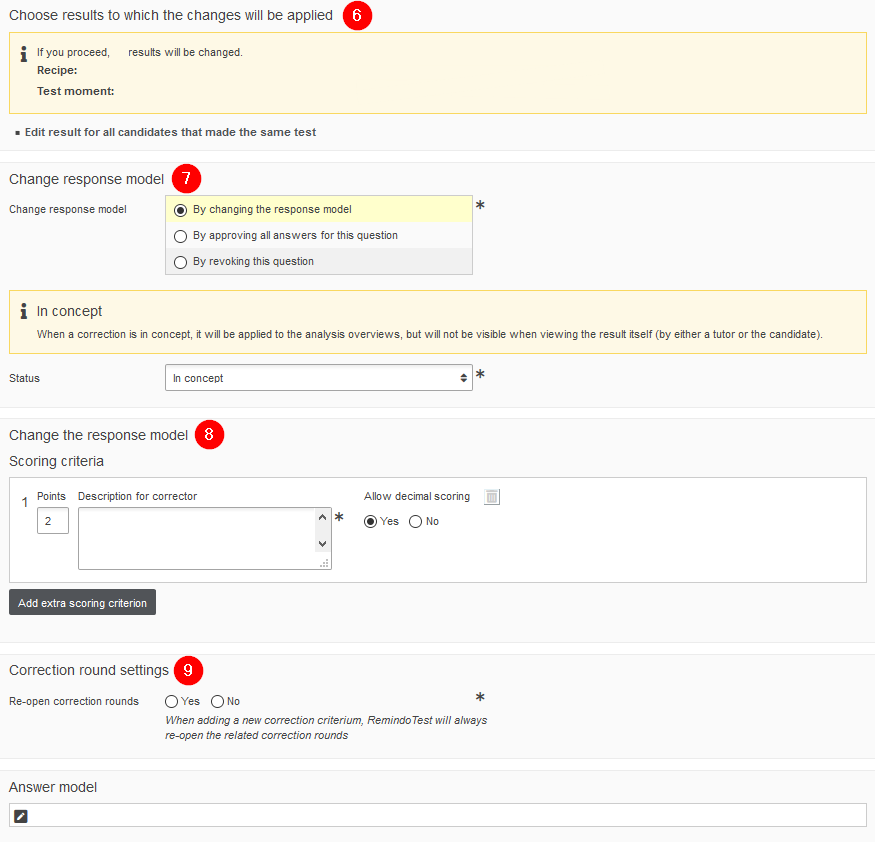
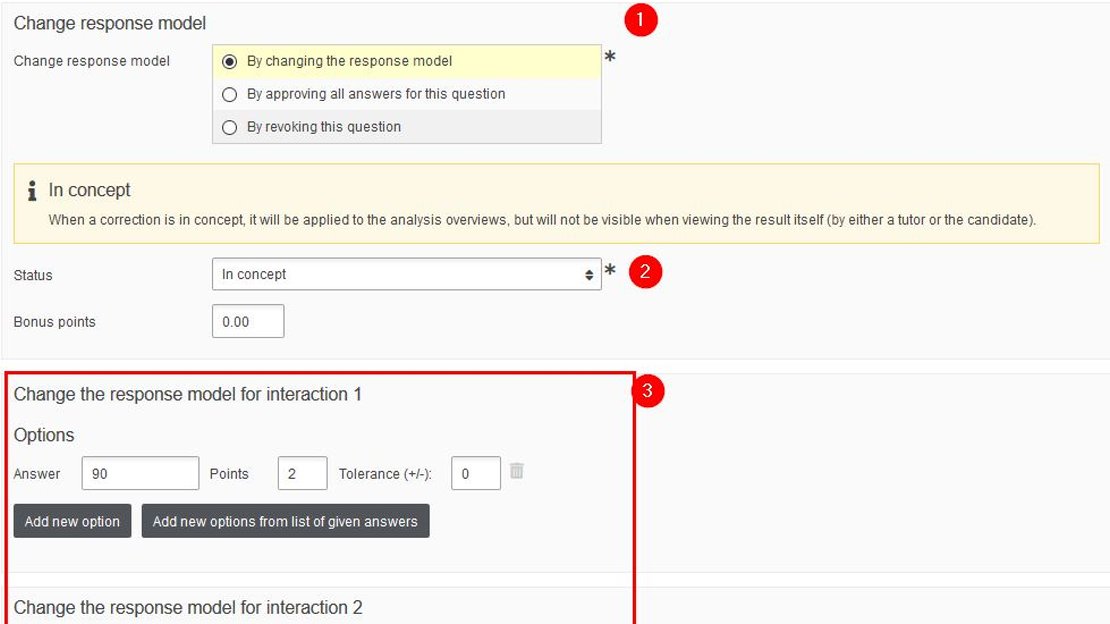
6. To which results would you apply the changes? Remindo will standard select the test moment and test recipe, which was selected in step 3.
7. Which correction do you want to make? It is recommended to make changes in the scoring criteria at first in concept.
8. When you have chosen 'by changing the response model' (at step 7), the current scoring criteria of the item are visable. It is possible to change these current criteria or to add a new scoring criterium.
9. Do you want to re-open correciton rounds, after changing the score model?
NOTE: When adding a new correction criterium, Remindo will alway re-open the related correction rounds.
- Edit corrections after submitting the correction work
Once a student's results have been submitted, they are no longer available through Results > Check answers. However, you can still access their results through the Analysis page. Thereby, for a course coordinator it is possible to edit the correction for an individual student.
- Edit the corrections for an individual student
Follow the steps below to edit a correction for a specific question and student:
1. Go to Remindo toets, log in by SURF-conext (UT-account).
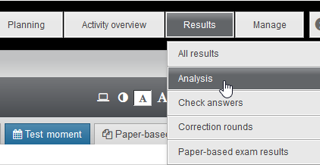
2. Click on Results > Analysis and click the tab for 'Test moment'. Filter for the right test moment.
3. On the analyse-page at the tab Overview, you can click the 'Result details' icon next to a student name to open their results:

4. Next to each open question, you will see the following information:
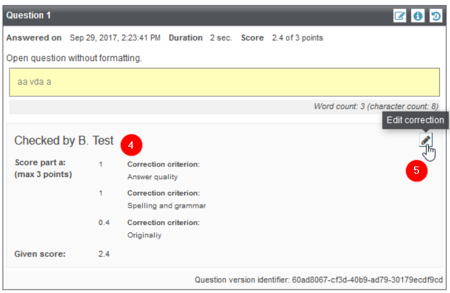
5. The name of the corrector is shown ('B. Test' in this example) and the points given for each correction criterion
6. When you click the pencil icon you, as a course coordinator, can edit the correction.
- Plagiarism check
If there is a risk of cooperation between students during the exam, or if they may have access to the internet, you can enable a plagiarism check in your Remindo exam. The examinations office can tell you more about this option and activate it when the exam is scheduled.
After the exam, you will see an additional button in the Remindo grading interface:
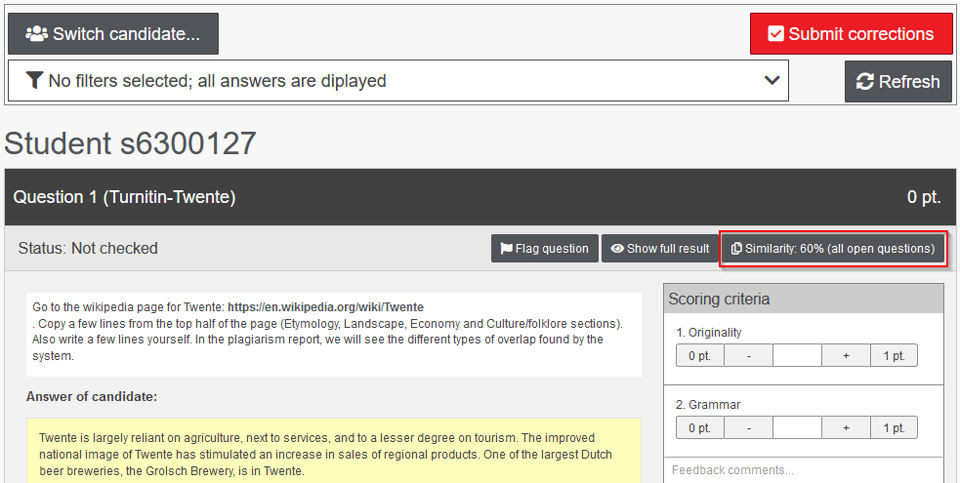
When you open this report, you will see the Turnitin plagiarism report. The reports can also be opened from the Analysis page:
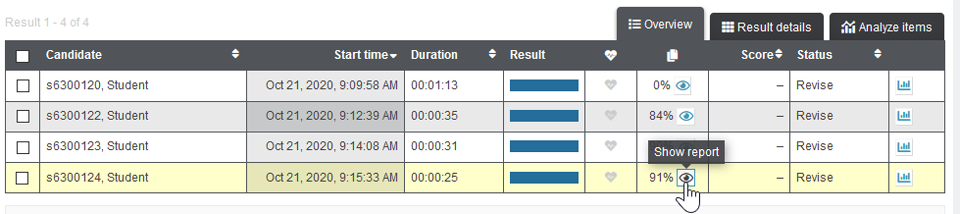
From both locations, you will be taken to the Turnitin similarity report:
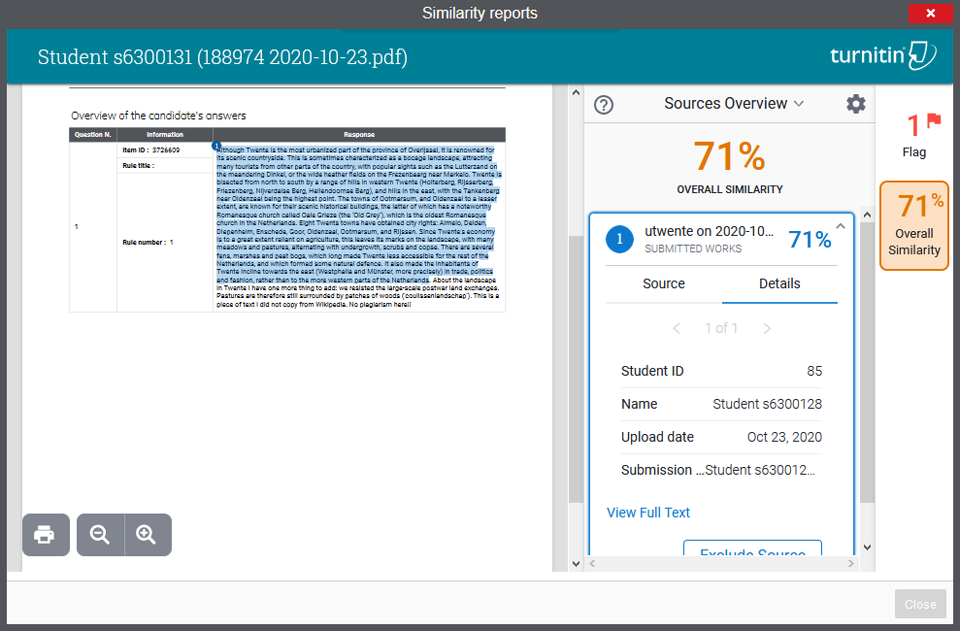
The system highlights the similarities found and the source (website or other candidates). If an overlap is found with another student, the report will indicate the name of the student in question (Student s6300128 in the example above).
Good to know:
- The option for a plagiarism check must be activated at the time the exam is scheduled. Plagiarism reports cannot be created after the fact.
- Please include a notification on the exam cover sheet that the student's work will be checked for plagiarism. In Canvas an automatic warning is built in, but this is not (yet) the case in Remindo.
- You can use 'print to PDF' to export individual reports (no bulk download).
- The reports are generated immediately when each student hands in their work. If two students are cooperating, the first student will at first have a score of 0%. You will of course be able to tell because their name will appear in the report for the second student, but it may be confusing that the score does not occur in both reports. The scores are refreshed at a later point, so this may only occur at the beginning.
- When a group of more than two students have all handed in overlapping work, the system may only show the largest overlap in the report (and not show the other student names). Please be aware of this if you come across a situation like this. We are working with the software supplier to improve this functionality.
The Turnitin website has more information about reading and interpreting the similarity reports.
More information about Turnitin can be found following the link below:
-> help.turnitin.comIf the system flags any suspicious behavior, please consult with your Board of Examiners about current procedures in your programme / faculty.
- Closed questions
Closed questions will be checked automatically by Remindo, based on the given correction criteria. It is possible to change these correction criteria or scores afterwards, by changing the response model:
- How can you edit an answer key?
- Go to Results - analysis
- Go to Tab "Test moment" tab

- Select the test recipe
- Click on Analyze items

- Click on Show interaction analysis
 (at the end of the row of the item)
 - Click on the Correct scoring model
- Which settings are possible in changing the answer key?
- Change response model: Remindo supports these options to make alterations to the answer keys.
- Status: Changes can be made in concept first and approved by another person or you can make them active right away.A preview of the new results (grades) is visible at the bottom of the page in Remindo*.
- Change the response model: When at point 1 'By changing the response model' is selected, you can change the response model. By adding new options or scoring criteria to the answer key.
* Please note: a change in the answer key can also have a negative effect on the result (grade). If you have any questions, please contact e-assessment-ces@utwente.nl
5. Analyse
After the exam and checking the results, the lecturer can analyse the results and students can be given access to their exam for review.
- Results analysis
The analyse page (results - analysis), specific the tab 'analyze items', can help you decide if there were any issues in the exam. For example, a lot of students may have had an alternative interpretation for a multiple choice question, and you want to add their choice as a correct option. Or perhaps there was an error in a question and you want to remove it from the exam altogether.
The Analyze items report looks like this:
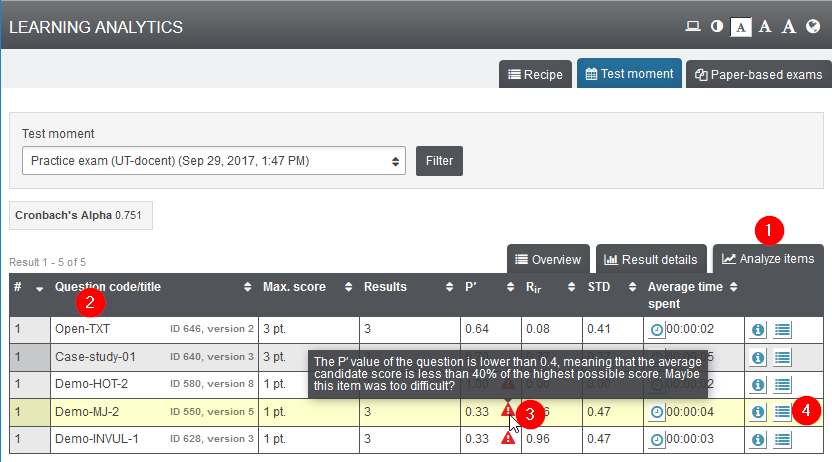
1. For a specific test moment, click Analyze items. In this tab the detailed information about the items of the test moment is given.
2. Each question is identified by its numeric ID and the code that you entered when you created the question
3. Exclamation marks are displayed next to items the software has identified as potential issues. A tooltip explains the nature of the issue.
4. You can use the interaction analysis to gain more insight in the given answers. Thereby, it is also possible to change the response model.
- Changing answer key
- How can you edit an answer key?
- Go to Results - analysis
- Go to Tab "Test moment" tab

- Select the test recipe
- Click on Analyze items

- Click on Show interaction analysis
 (at the end of the row of the item)
 - Click on the Correct scoring model
- Which settings are possible in changing the answer key?
- Change response model: Remindo supports these options to make alterations to the answer keys.
- Status: Changes can be made in concept first and approved by another person or you can make them active right away.A preview of the new results (grades) is visible at the bottom of the page in Remindo*.
- Change the response model: When at point 1 'By changing the response model' is selected, you can change the response model. By adding new options or scoring criteria to the answer key.
* Please note: a change in the answer key can also have a negative effect on the result (grade). If you have any questions, please contact e-assessment-ces@utwente.nl

- Student review
A review session can be scheduled in Remindo. This can be scheduled in two ways:
- As a short session in the Carré building, scheduled by the exam office Students will only be able to access the review from there, making sure the exam questions remain protected.
- The review can be set to be available from anywhere. In this case, students can review their work at their own convenience from home.
In both cases, students can see their own exam and results once they log in. They cannot make any edits. The page contains the following elements:

- A time limit can be set.
- Exam details
- The exam can show all result details. You can also choose not to display these.
- The student's own answer and the correct answer will be shown. It is also possible to choose not to show the correct answer.
If desireble, the lecturer's remarks, the grading model and the feedback from the item bank can be shown during the review.
6. Report
When grading and analyzing has been finalizedThere are several reports available to export the exam results from Remindo.
- Exporting all students results
It is possible to export a detailed table with points per question per student:
1. Go to Remindo toets, log in by SURF-conext
2. Click on Results - All results, select the tab Test-moment.
3. Select the right test moment by using the filter option.
4. Click on the tab Result details.

5. Use the checkboxes to choose all or some results.
NOTE: If a few students have not been finalized, you need to exclude them from the report. This detailed report can only be generated for students where grading has been finalized.
6. At the bottom of the page, you can choose to Export to Excel.

- Generating an Osiris worksheet tab
You can generate a worksheet of the results that can be imported into Osiris. The Osiris worksheet can be found on the Overview tab:
1. Go to Remindo toets, log in by SURF-conext
2. Click on Results - Analysis, select the tab Test-moment.
3. Select the right test moment by using the filter option.
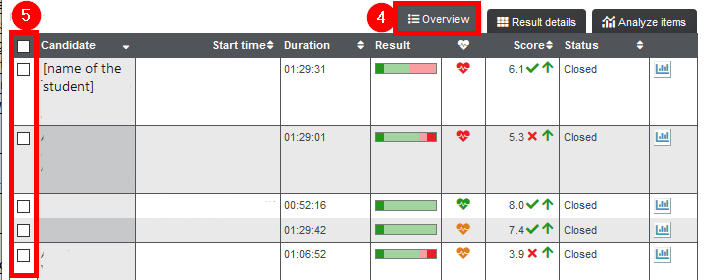
4. Click on the tab Overview

5. Use the checkboxes to choose all or some results.
6. At the bottom of the page, you can choose to Export as an Osiris text file.
As a teacher, you can import this data directly into Osiris teacher.
Your faculty examinations office can import these grades into Osiris. When you send them the file, please follow their normal guidelines for signing examination results.
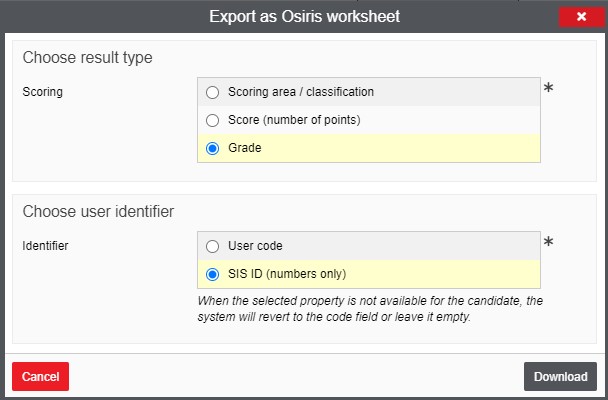
7. Select the following export settings:
- Publishing grades in Canvas
Grades from Remindo can be exported into Excel, this can be found on the Overview tab. UT Canvas support has developed an Excel macro that uses the Remindo export file to create a Canvas Gradebook importfile with the Remindo grade. You can ask your Canvas contact person to send you the Excel macro.
1. Go to Remindo toets, log in by SURF-conext
2. Click on Results - Analyses, select the tab Test-moment.

3. Select the right test moment by using the filter option.
4. Click on the tab Overview
5. Use the checkboxes to choose all or some results.
6. At the bottom of the page, you can choose to Export to Excel. This Osiris export is also the basis for the Canvas macro.

7. Evaluate
There are several methods for evaluating the questions used in exams. In Remindo there is much information about the questions available. In the following pages, some tools in Remindo are described, to use in evaluating used questions.
- Statistics for each question
You can view statistics for each question that has been used in an exam.
1. Go to Remindo Toetsmanager, log in by SURF-conext (UT-login).
2. Click on Questions.
3. Click on a question and on the tab Statistics.

4. Various statistics are available, per version of a question. For an explanation of P and RIT values, please see the CELT website.
- Analysing and filtering questions for reuse in future exams
In the item bank, you can search for keywords or filter questions to find previously used material:
1. Go to Remindo Toetsmanager, log in by SURF-conext (UT-account).
2. Go to Questions.
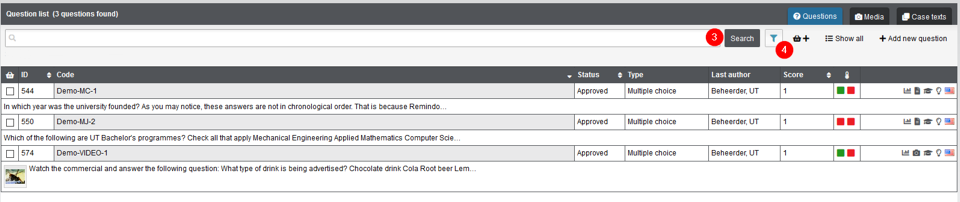
3. In the search box you can enter key words, the question code or question ID, to search for specific questions.
4. By using the filter icon it is possible to filter for example on, properties, categories or question types, to specify the founded questions. For more information about using properties and categories in Remindo, please see the page 'Compose'