Short link for this page: utwente.nl/printing.
MULTIFUNCTIONAL PRINTERS (MFPS) ARE AVAILABLE IN UT BUILDINGS FOR STUDENTS AND EMPLOYEES.
Card registration
To register your student or employee card for the first time (or replace a lost/stolen card):
- Scan your card at the printer.
- Enter your UT email address on the display as requested.
- You will receive an e-mail with a link to confirm the registration. The link is valid for 20 minutes. The printer will send you an email with an activation link.
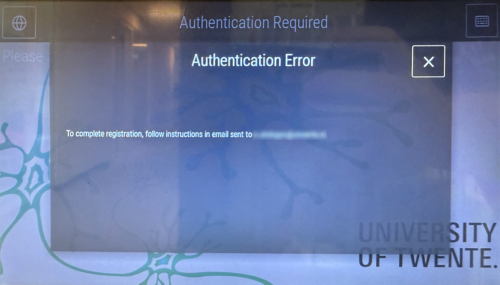
- Login to the activation website if needed. If you see the following screen, you have successfully activated your card:
- You can now print documents. See the 'manuals for printing' section below for more details.
Printing
The printer is already set up on UT-managed Windows laptops/PCs, used by most employees. When printing, select the printer called Follow me on printservice.utwente.nl. You can collect your prints at any Xerox Multi Functional Printer (MFP) on campus: Scan your card, hit the follow me button on the display, and select the document you want to print. For student computers and details per operating system, see the manuals below.
Reporting issues
The office managers of the faculty or service that owns the printer are responsible for restocking paper. Office managers can order paper from the CFM service desk, which will order and deliver it.
Student print quotum
UT students do not have to pay for printing or copying. Instead, there is a fair use policy. The limit for students is 500 prints per student per calendar year.
Can I increase my print quota? No.
This answers my question.
Thank you for your feedback
How can I see how many pages I have left to print? - Log in with your UT account (student email address) and password at https://printservice.utwente.nl.
- Click on your student number in the top right corner and select Profile.
- At Print Quota, you can see the remaining pages.
This answers my question.
Thank you for your feedback
The printer displays the error message “deleted due to insufficient quota,....” This error is displayed when your quota is insufficient to print the file in question.
This answers my question.
Thank you for your feedback
Papersize & Printing costs (students) Every student has 500 printing credits per year, this cannot be extended or changed. Every print you make (it doesn't matter if this is on A4 or A3 paper costs 1 of those credits).
ps. Bear in mind that the small Versalink printers only have A4 paper and only the bigger Altalink printers have A3 & A4 paper available.
This answers my question.
Thank you for your feedback
Printer features
Copy | Print | Scan |
| - From personal device
- From employee workstation (employees only)
- E-mail attachment
- Print from OneDrive
| - Scan to email
- Scan to OneDrive
- Scan to home drive M (employees only)
|
Professional print service
Xerox copy shop locations
Xerox copy shops in UT buildings offer professional printing services (large amounts and exceptional formats like A0 posters). Not all products/services are available in all locations.
Carré building (at hal B entrance)
(053) 489 24 85 | xeroxcarre@utwente.nl
Bastille
(053) 489 4215 | unionshop@union.utwente.nl
Manuals for printing
These manuals use a consistent style of writing: references to text and buttons on screens are printed in italics, information that you have to enter yourself is printed in bold.
You will need the following:
- An established internet connection.
- An ICT-account. This is your UT email address with associated password.
- An activated employee- or student card. See the paragraph above for one-time card registration.
Windows: printing from employee pc/laptop The printer is already installed on UT workstations (notebook or desktop with Windows). When printing your document, select the 'Follow me' printer from the list of available printers.
Windows: printing from private pc/laptop (students/employees) Step 1: Making connection
- Press the Windows key + R, type \\printservice.utwente.nl and click OK.
- Doubleclick Follow-Me and the printer will begin installation.
Step 2: Log in
A new screen Windows Security appears.
- At username, type your UT e-mail address
- Enter your password.
- Click OK.
Step 3: Download driver
The printer is now being installed. This could take a few minutes. As soon as the next window appears, installation is complete. You can close this window.
Step 4: Printing
Select printer Follow-Me on printservice.utwente.nl for printing on the Xerox MFPs.
Mac printing (UT managed) Open the Self Service application.

Browse to Printers and click on the Install Xerox C8135 (follow-me) printer.
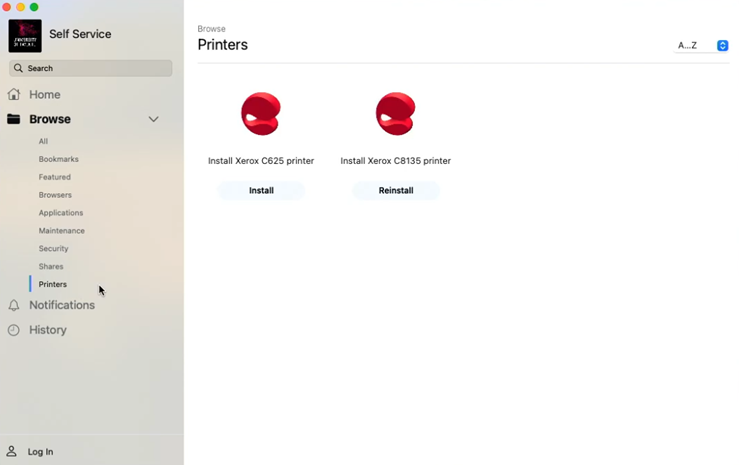
Click (re)install to start the setup.
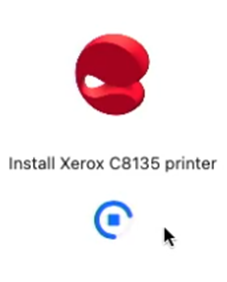
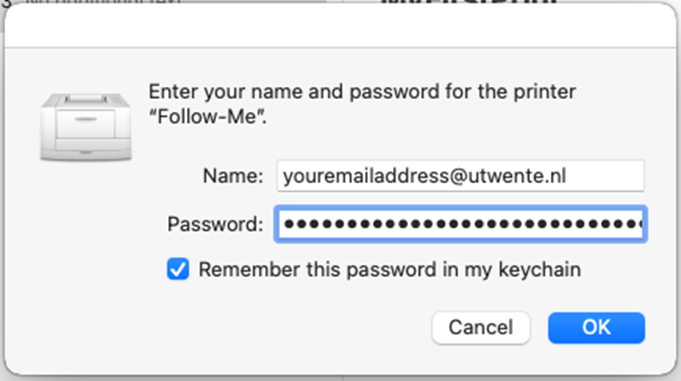
When printing for the first time on the Follow-Me printer, your UT account is required.
- Enter your UT email address next to Name.
- Enter your password next to Password.
- Check Remember this password in my keychain.
- Click OK.

These instructions were written for Mac OS 12.7 or higher. The steps for earlier editions of Mac OS are virtually identical, but the illustrations could differ slightly. Make sure no Follow-Me printer is already installed.
INSTALLATION FOLLOW-ME PRINTER
Step 1: Drivers
- Download the drivers here (select your operating system from the list).
- Install the drivers following the wizard.
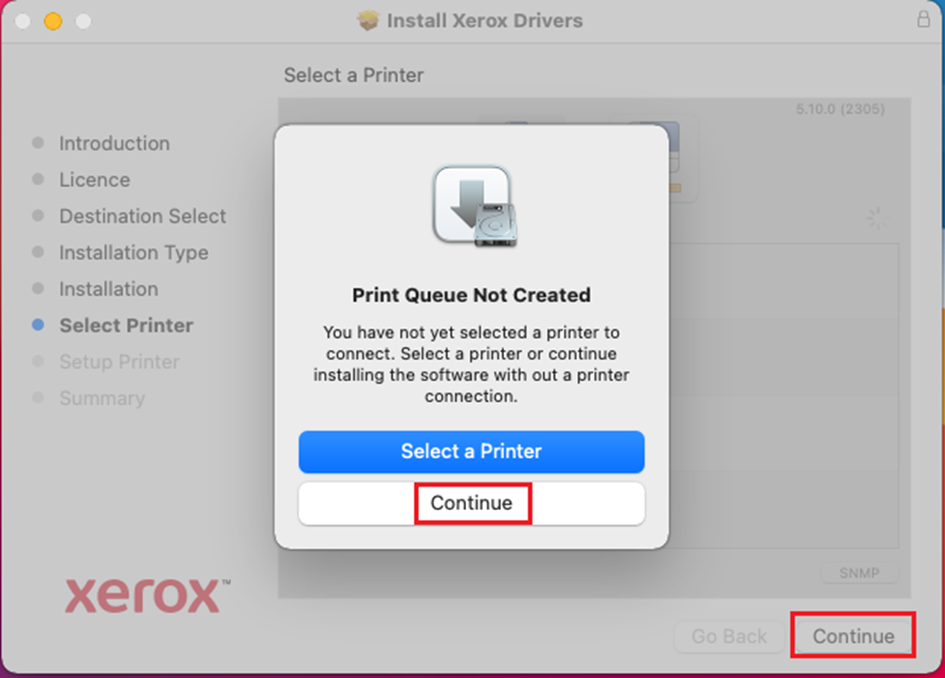
- When at step Select Printer, click Continue.
- Click Continue in the top of the screen.
- Finish and close the wizard.
Step 2: Print and scan
- Open System Preferences.
- Click Printers & Scanners.
Step 3: Add printer
- Click the + sign.
- Click Add Printer or Scanner…
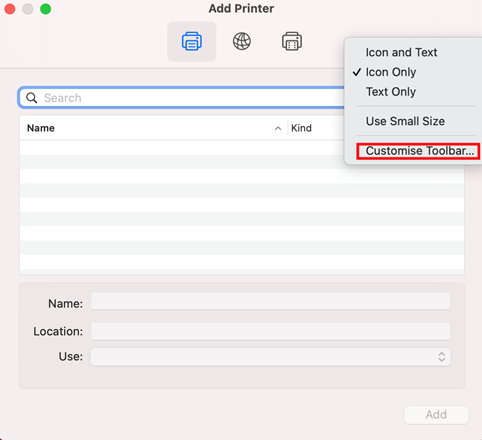
Step 4: Toolbar customization
- Right-click the toolbar.
- Click Customize Toolbar.
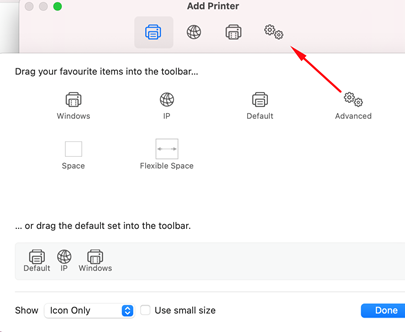
Step 5: Advanced
- Drag Advanced to the toolbar.
- Click Done.
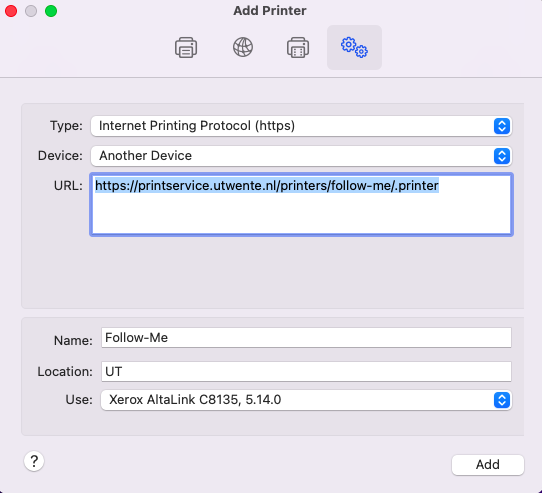
Step 6: Internet printing protocol (https)
- Click Advanced.
- Next to Type select Internet Printing Protocol (https).
- Next to Device select Another device.
- Next to URL enter: https://printservice.utwente.nl/printers/follow-me/.printer
- Next to Name enter: Follow-Me.
- Next to Location enter: UT.
- Next to Use click Select Software.
- Select Xerox Altalink C8135.
- Click Add.
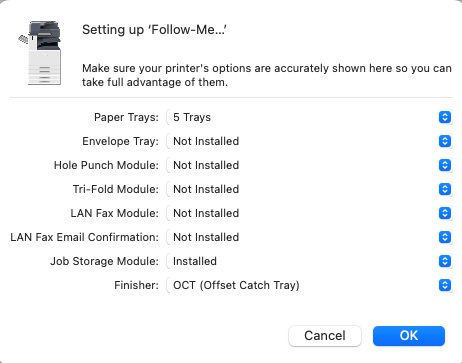
Step 7: Finisher
Click OK.
When printing for the first time on the Follow-Me printer, your credentials are required.
- Next to Name enter your UT email address.
- Next to Password enter your password.
- Check Remember this password in my keychain.
- Click OK.
Mac printing after changing your password Clear the queue and removing the printer
- (Optional) If you see a bouncing printer icon on your taskbar, click on it to open the printer screen. You will most likely see a message saying: “Hold for authentication” make sure to delete the prints that are waiting in queue for you here by clicking the cross icon in the end of the row. If there are no prints waiting here you can skip this step.
- Press CMD + Space (or click the magnifying glass in the top right of your screen) and type Keychain (the box will automatically fill in the rest of the word keychain when you start typing. In Dutch this option is labelled “sleutelhanger toegang”. Press Enter to confirm.
- Make sure to select “All items” in the keychain window.
- Search the list for the option Follow-me (blue icon) in the category ‘Network password’.
- Right mouse click or CTRL + click this entry and select: Delete “Printservice”, confirm this action by clicking Delete.
INSTALL FOLLOW-ME PRINTER
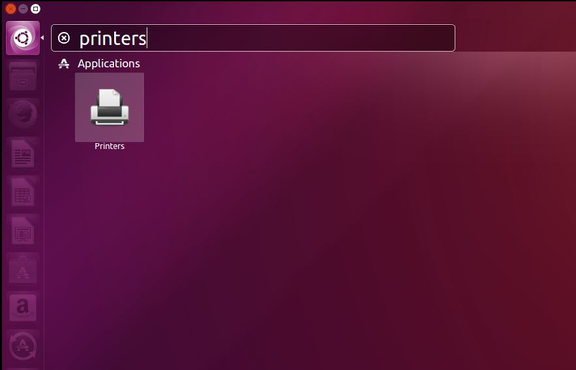
Step 1: Open printer settings
- Go to the Dash.
- Enter Printers.
- Click Printers.
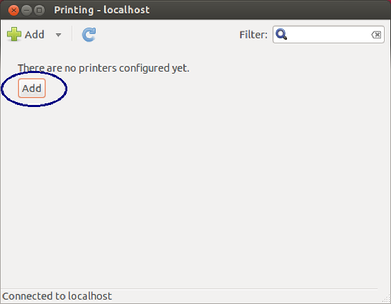
Step 2: Add new printer
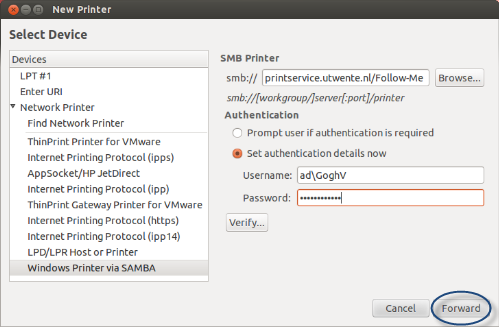
Step 3: Authentication
- Under Devices > Network Printer select Windows Printer via Samba.
- At smb:// enter printservice.utwente.nl/Follow-Me
- Select Set authentication details now.
- At Username: enter your UT e-mail address.
- At Password enter your corresponding ICT account password.
- Click Forward.
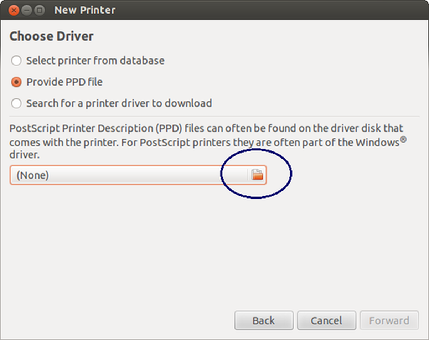
Step 4: Choose driver
- Select Provide PPD file.
- Click the folder icon next to (None).
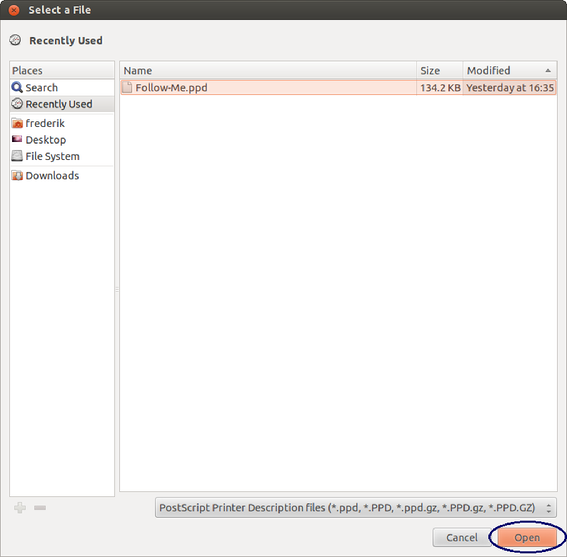
Step 5: Select .ppd file
- Download the PPD here.
- Browse to the location where you have stored the .PPD file
- Select the file.
- Click Open.
Step 6: Choose driver
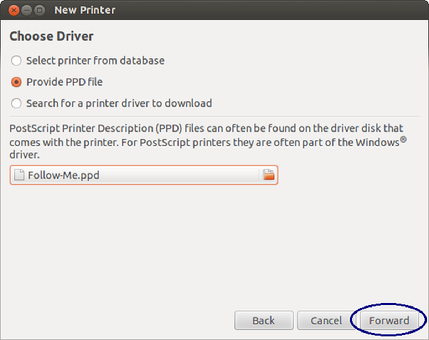
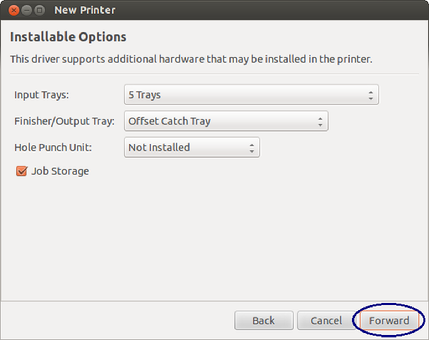
Step 7: Installable options
- Set Input Trays to 5 Trays.
- Check Job Storage.
- Click Forward.
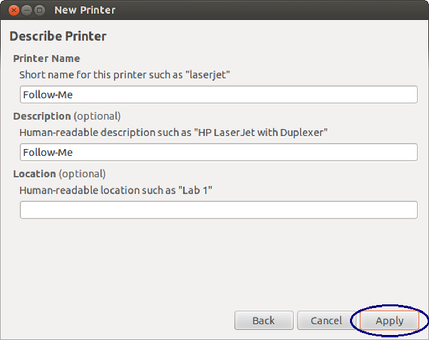
Step 8: Describe printer
- At Printer Name enter Follow-Me.
- At Description enter Follow-Me.
- Click Apply.
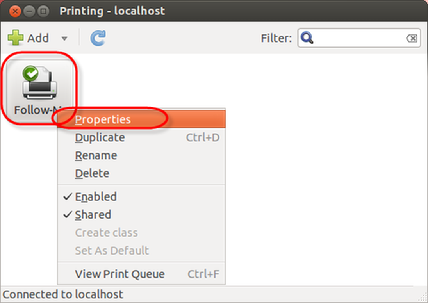
Step 9: Properties
- Right-click the Follow-Me printer icon.
- Click Properties.
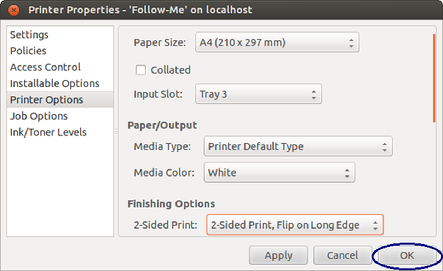
Step 10: Printer options
- Select Printer Options.
- Set Paper Size to A4.
- Set Input Slot to Tray 3.
- Set 2-sided print to 2-sided Print, Flip on Long Edge.
- Click OK.
You are now ready to print.
You can print all popular document formats, including Microsoft Office and PDF by sending an email with a document attached to mobile-print@utwente.nl.
- On the printer, select Connect for Microsoft OneDrive.
- Sign in with your UT OneDrive credentials.
- Choose whether you want to print or scan document(s).
- Browse your OneDrive storage to select a document to print (Office, jpg, tif, png, pdf file format), or to save a scan.
- Select OK to start the job.
FAQ
How long will my pending document be stored? The printer will be rebooted every morning around 6:00. This process erases all pending documents.
This answers my question.
Thank you for your feedback
My files have disappeared from the queue, but they were not printed. You have probably selected the wrong paper size for the document you wanted to print. Check whether this is causing the problem: Whenever possible, use A4 or A3 size. Try to avoid the Legal or Letter options. You can do so using the print menu of the file you wish to print.
- Click the “Follow Print” button.
- Select the right document.
- Click the Info button on the screen.
This answers my question.
Thank you for your feedback
What can I do to make my printing more environmentally friendly? In the print menu, select the option to print multiple pages on a single piece of paper and make sure to always use two-sided printing.
This answers my question.
Thank you for your feedback
The “Scan to home” feature does not work for my student account. Students do not have a home directory, so they cannot use this feature.
This answers my question.
Thank you for your feedback
I do not have a student or employee account but I need to print. What can I do? Third parties cannot use the MFPs on campus. You can print in the Xerox Reproshop, located in the Bastille and Carré buildings.
This answers my question.
Thank you for your feedback
Can I request a new printer? The director of the faculty or service must approve the request for an additional printer. You can request by contacting the Servicedesk ICT.
This answers my question.
Thank you for your feedback
Contact