You might be familiar with PowerPoint as presentation software, but did you know PowerPoint also includes a basic audio and video recording facility? You can use this function to make a simple screen recording of your PowerPoint presentation with a voice-over that goes along with each slide. If preferred, you can also record your webcam to go with it. This way, you can produce a simple screencast within a few minutes.
How to use PowerPoint to create screencasts?
First, make sure you have the Office 365 version of PowerPoint is installed. You can find step-by-step instructions and video tutorials on how to get started with recording a screencast below or on the Microsoft support website.
Follow these easy steps to record a lecture using Microsoft Powerpoint and your slides:
Note that this recording works better with slides created in 16:9 aspect ratio.
- Take a look at the microphone setup tutorial to make sure your microphone is working.
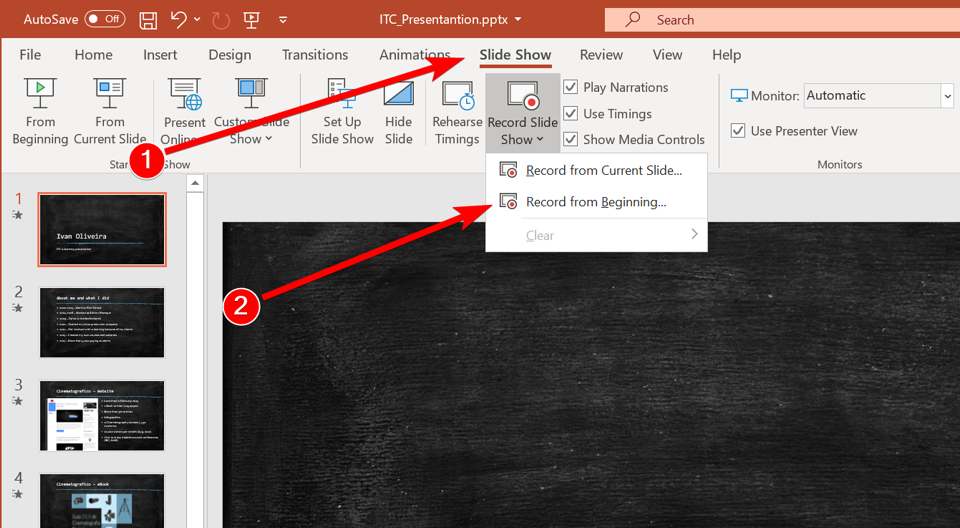
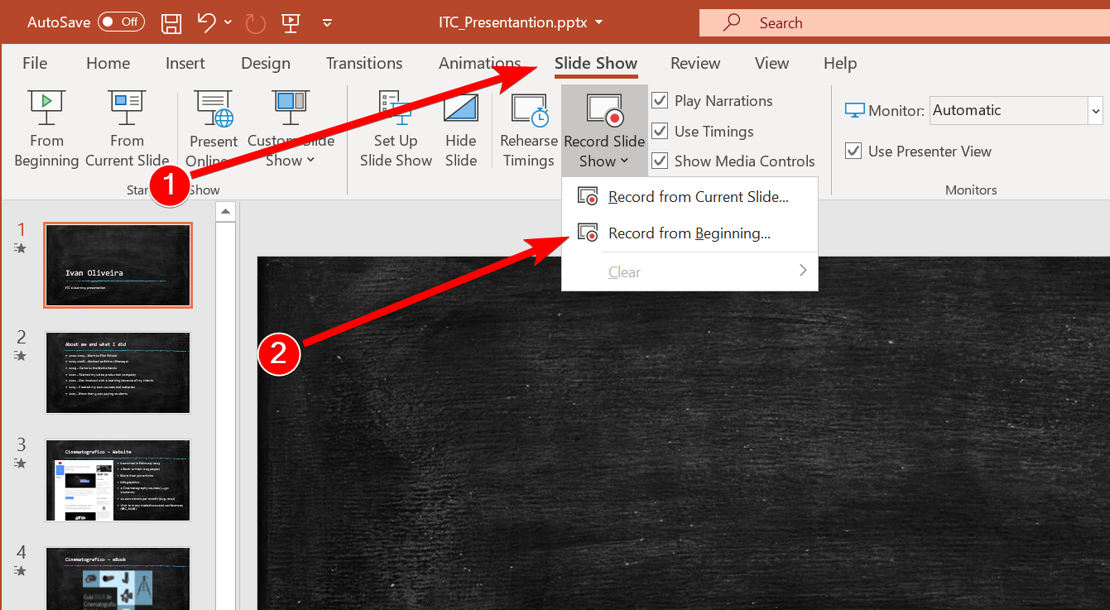
- Once your slides are ready to present go to the Slide Show menu and click Record from Beginning
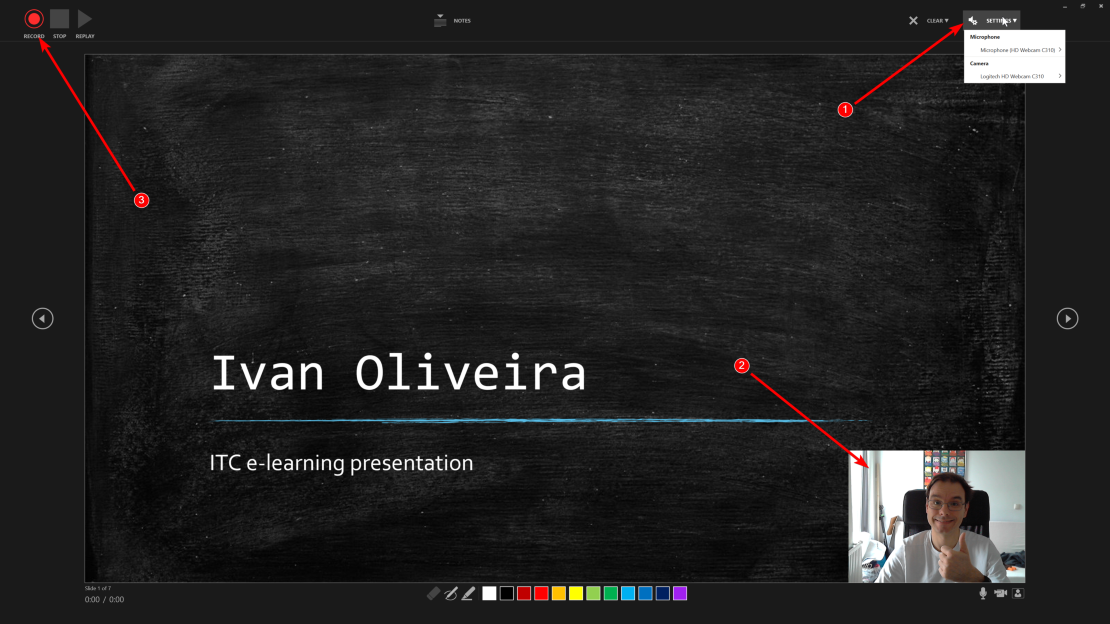
- Powerpoint will go fullscreen.
- You can click on Settings (1) and select which Microphone you want to use to record (for instance your laptops internal microphone or the microphone of your headset)
- You can see your webcam (2) video at the bottom (which you can resize, place somewhere else, turn off)
- Once you're satisfied with what you see, click the record button (3) to start recording
- At anytime you can turn camera or microphone off by clicking the icons below the webcam image
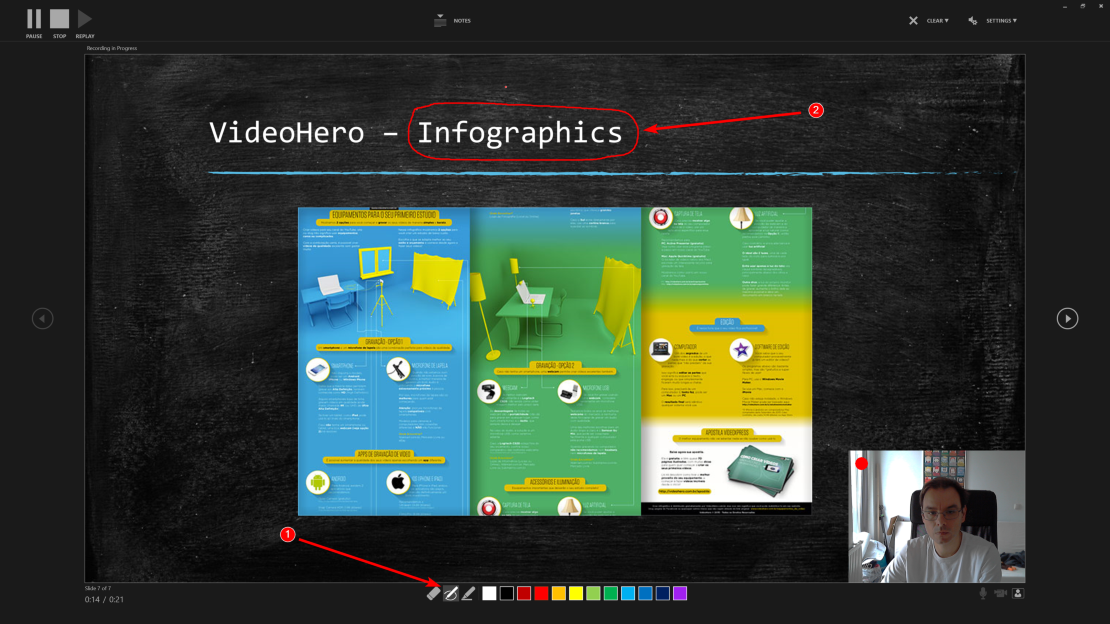
- At the bottom of the screen there are tools for annotation (1) while you present. You can point or circle (2) things with your mouse while you speak.
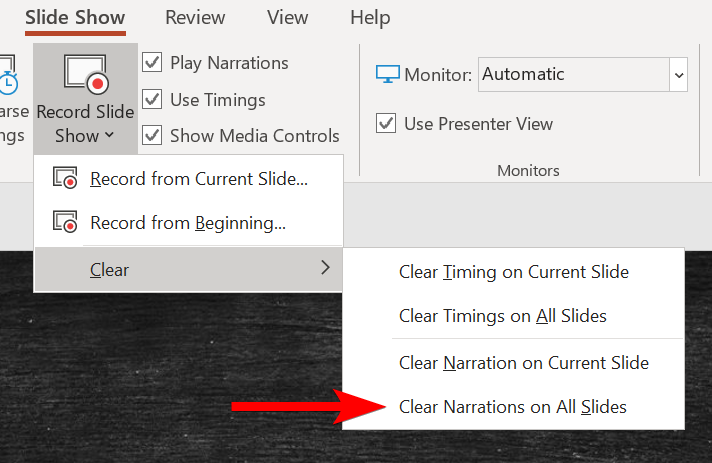
- Not happy with your performance? You can clear the narration for all slides and start over from step 2.
- If you are happy with the result, click File

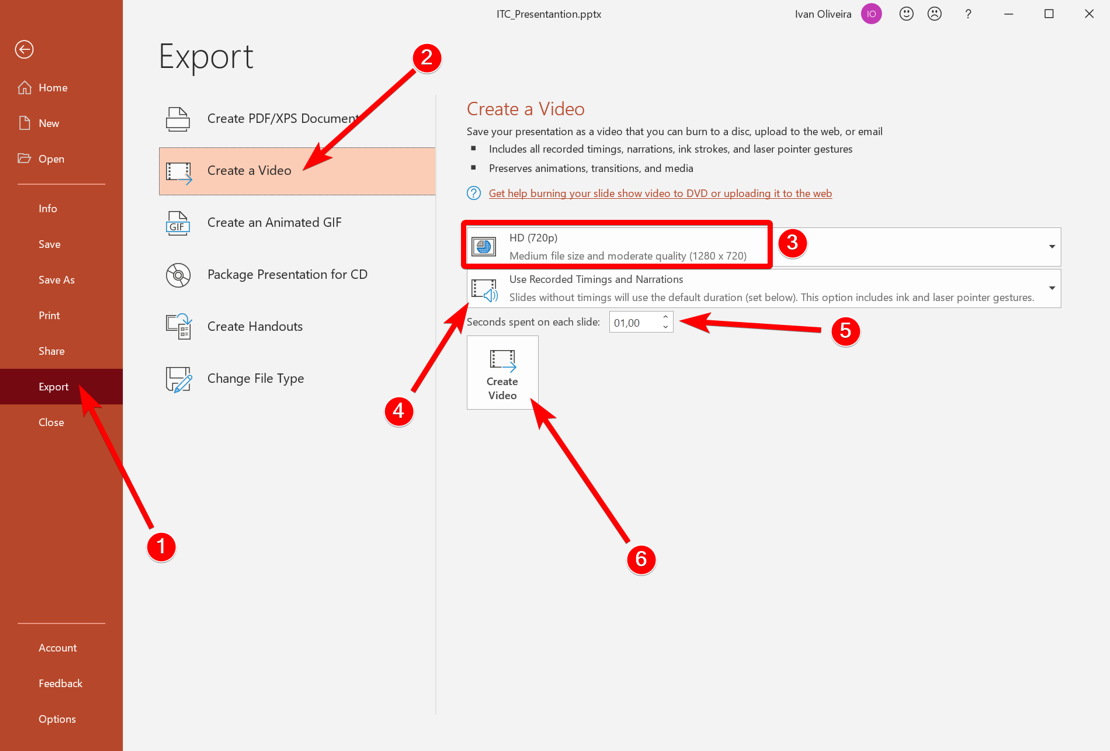
- Open the Export (1) Menu, click in Create a Video (2).
- On the dropdown (3) menu you can select the resolution, please select FullHD (1080p) or HD (720p).
- In the second dropdown (4) maintain "Use Recorded Timings and Narrations"
- Select the automatic time (5) for slides with no Narration or recorded time (for instance if you stopped recording in the middle of the presentation or if you skipped the two last slides because they are just a list of references)
- Click Create Video (6)
- Give your video a meaningful name (1) and save the video as MP4 (2) , not wmv.
Attention: don't name your video "video 1.mp4" use names like "20200317 - Ivan Oliveira - How to Use Powerpoint part 1 of 2.mp4"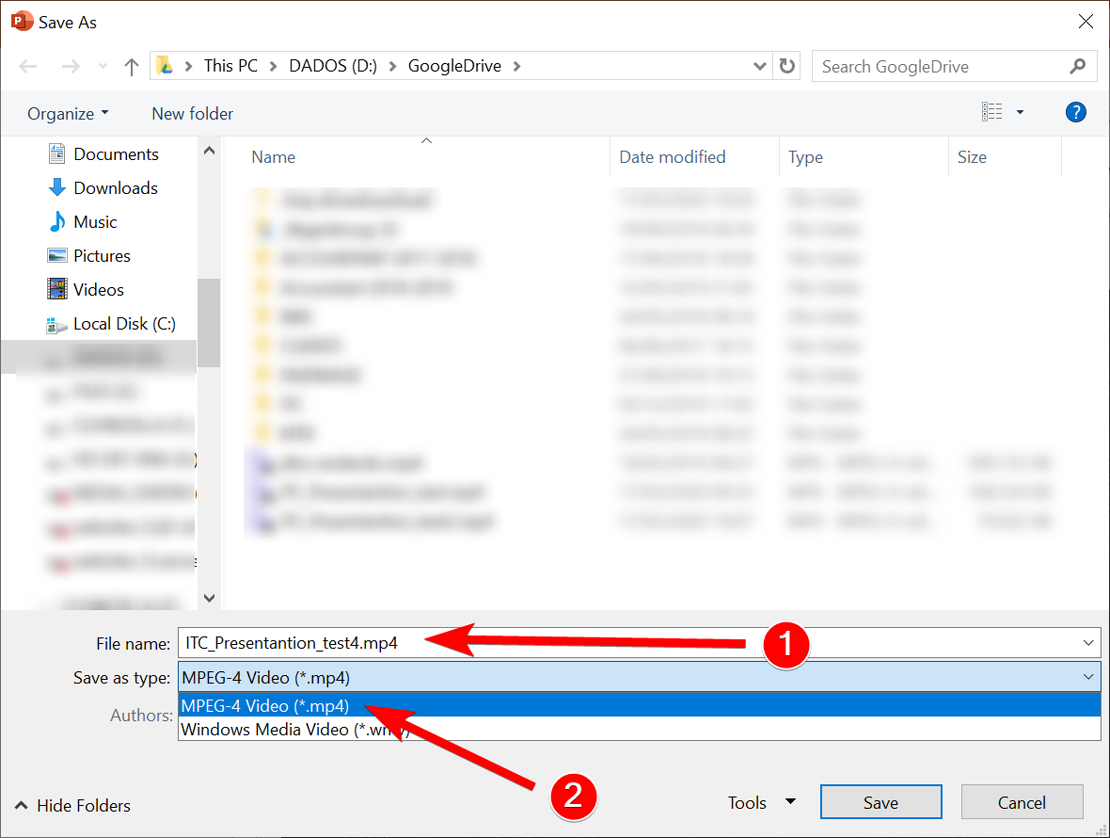
- On the bottom of the screen you will see the progress bar showing how far Powerpoint is with the rendering of the video.
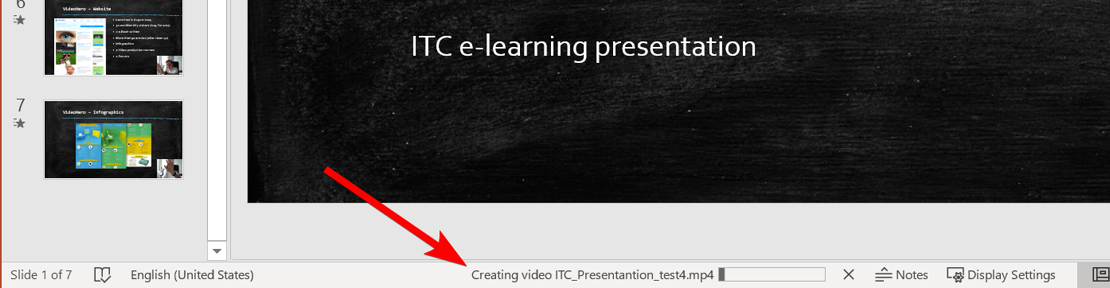
- Once the video is saved (Powerpoint won't give you any notice) please open and watch the video to make sure it looks and sounds like you expect.
Contact
If you need support, please contact your faculty’s E-Learning Specialist or the TELT team.