The concrete canoe competitions are competitions whereby teams need to do speed challenges with their own made concrete canoes. So the aim is to make a concrete canoe which is fast and manoeuvrable. And of course it is also required that the canoe does not break and/or sink. For the construction it is not allowed to use materials which have any stiffness of their own. As concrete has a very low tensile strength it is quite challenging to create a canoe with the desired qualities.
Step 1: Make a model
The first step is to make a model on scale 1:1 of the canoe you wish to make. This can be done in software like Delftship, which we used. The output hereby is a CAD drawing, which in its turn can be used to create/print the model.
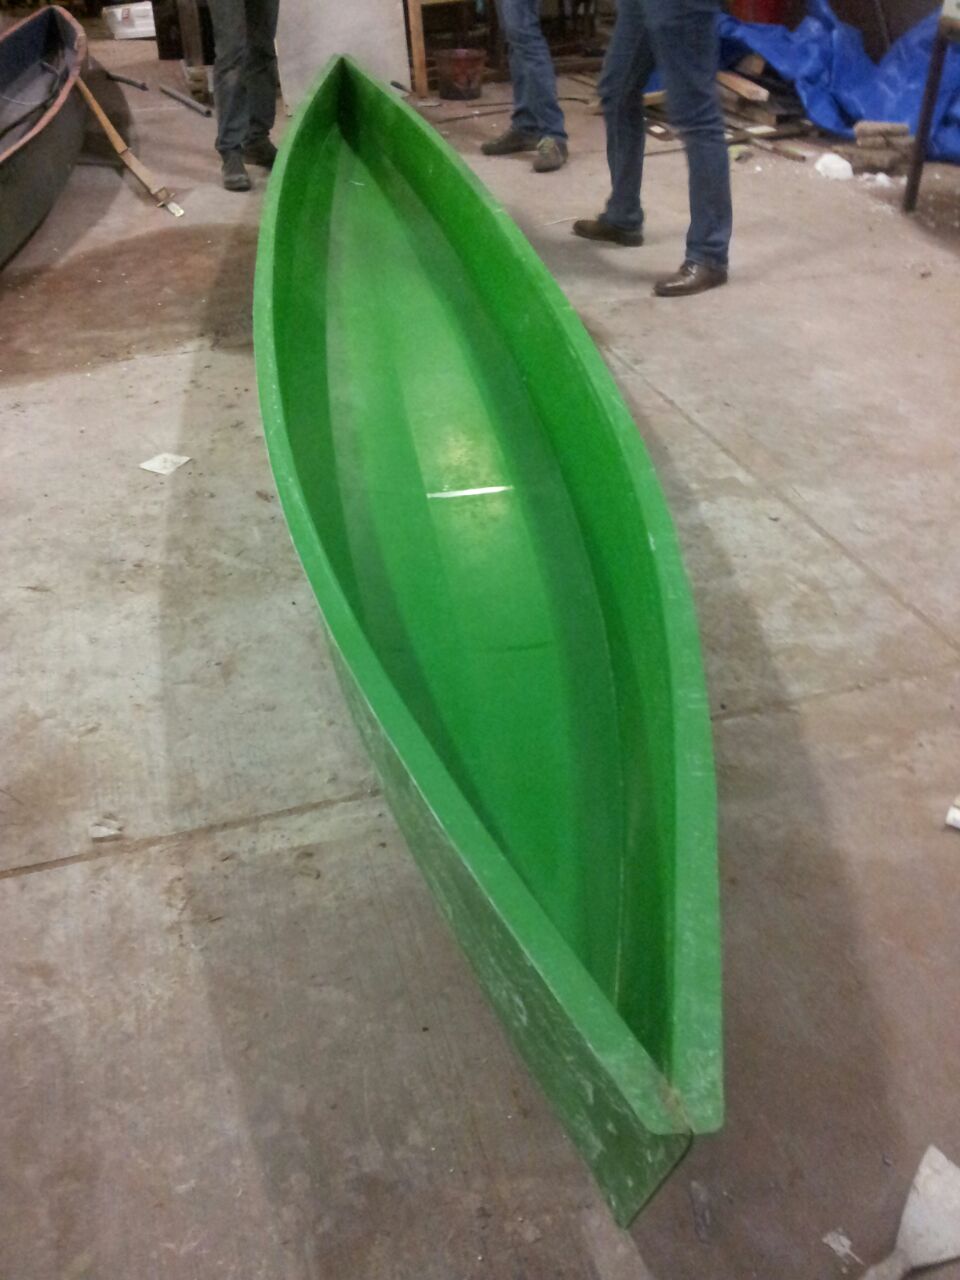
Step 2: Make a mould
With the model it is possible to create the mould. For this you need polyester and glass fibres. At first you paint the mould with an everything resisting painting. After that a special layer of a sort of de-mouldings liquid was added. The next step is to choose a colour and paint the whole model in that colour. After a drying period the real work can begin. Add several layers of glass fibres and a lot of polyester resin. This will take some time and after a drying period and some food to relax, you can de-mould the mould. Tada! the mould is born. The mould can be used multiple times until it is degraded to the point that it effects the smoothness of the canoes.
Step 3: Make the mould suitable for the pre-stressed cables
Now you probably start thinking about pouring concrete, but no, first it is necessary to made the mould suitable to fit for pre-stressed cables. By drilling some holes in the mould we make place for these cables. Also a wooden truss is attached to the mould to make sure it keeps its required width.
Step 4: Prepare for concreting
Now we are only one step away from the real work. The next step is to place the cables for pre-stressing into the mould. Besides, some de-mouldings oil should be sprayed in the mould to make sure it can be de-moulded afterwards.
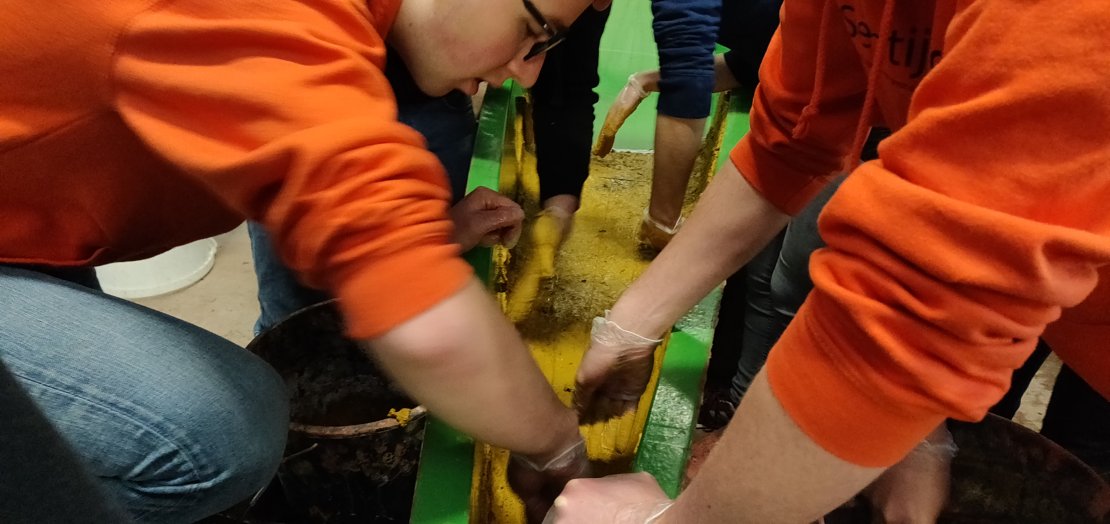
Step 5: Concreting
Now all the work is done to start with the best work: concreting. The first thing you need is to have some good working concrete. How to make this is the secret of chef Concrete (previously Prof Arms). It is a special process which asks a lot concentration and patience. With the perfect concrete it is possible to create a really thin layer of concrete in the mould (2 mm). After this first layer, you add reinforcement mesh. Then the mesh is “massaged” into the concrete. Next a second layer of concrete can be putted in the mould. Then a new layer of mesh can be “massaged” into the concrete. If this is done for the whole canoe, “the scraper” has to do his or her work. “The scraper” removes all the waste of concrete which was putted into the mould. A good scraper can reduce the weight of a canoe with 10%!. Finally the concrete should be spread a little wet and covered with some foil for the hydrating process.
Step 6: Enjoy and have a beer
After a day of hard working, the concrete should be left a alone and the workers should take care of themselves. With some beers en fried food everyone should relax and enjoy the satisfaction after a hard day of work.
Step 7: Let it harden
This is a crucial step of the process. Just leave the concrete alone and wait till all the cement is hydrated.
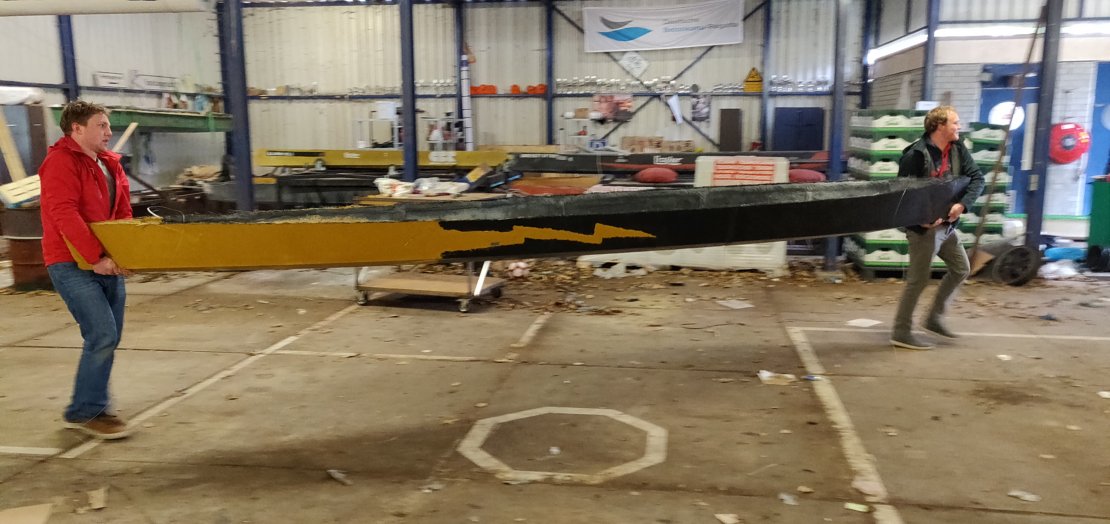
Step 8: Demoulding
After two days the concrete is hard enough to get the canoe off the mould and have a look at the result. Of course this is amazing, a new concrete canoe is born during this step. Now it is only a matter of time(28 days) till it is at the designed strength and it can be used for racing.
Step 9: Cleaning the mould
Of course in the mould are some rests of concrete. This should be cleaned really well and after this the mould is ready to use again, starting from step 4 all over again.