Introduction
Zoom is a cloud-based video communications app that allows you to set up virtual video and audio conferencing, webinars, live chats, screen-sharing, and other collaborative capabilities.
You don’t need an account to attend a Zoom meeting, and the platform is compatible with Mac, Windows, Linux, iOS, and Android, meaning nearly anyone can access it.
Why Zoom?
Although Canvas serves as our primary learning management system and supports all the functionalities you might need for education, there are certain situations where you might prefer to use Zoom to communicate or collaborate with students. For example:
- To meet with an individual student or a small group of students
- To meet with students that aren't part of the same Canvas course
- To organize (virtual) open office hours
Because there are still some safety concerns, the urgent advice is to only use Zoom when BigBlueButton and Microsoft Teams are failing functionality and only for non-confidential purposes.
How to use Zoom?
With Zoom, you can conduct live online lectures with a maximum of 300 students per meeting. However, we do have a small number of licenses available that can be used to temporarily increase the number of students that can join (please contact the Service Desk ICT for this and state the period for which this is necessary and how many participants are expected).
- Join a test meeting
You can join a test Zoom meeting to familiarize yourself with Zoom, in addition to testing your microphone/speakers before joining a Zoom meeting.
Instructions:
1. Visit http://zoom.us/test.
2. Click the Join button to launch Zoom.

3. If you have the Zoom desktop client installed on your computer, click Open zoom.us to launch Zoom.
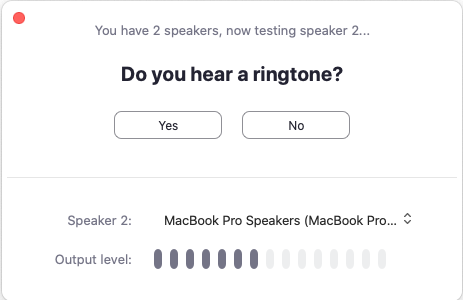
4. The test meeting will display a pop-up window to test your speakers. If you don't hear the ringtone, use the drop-down menu or click No to switch speakers until you hear the ringtone. Click Yes to continue to the microphone test.
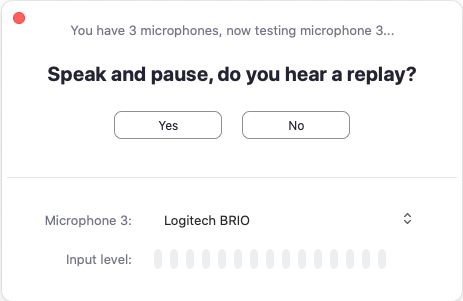
5. If you don't hear an audio reply, use the drop-down menu or click No to switch microphones until you hear the replay. Click Yes when you hear the replay.
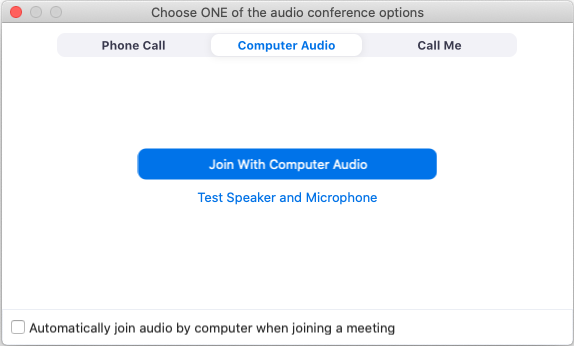
5. Click Join with Computer Audio.
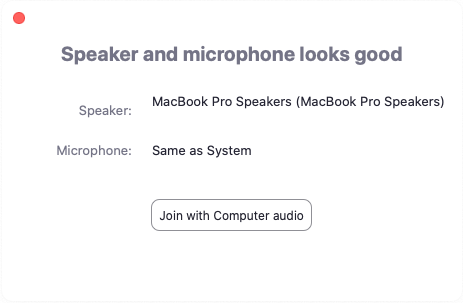
6. Click Join with Computer Audio to join the test meeting with the selected microphone and speakers.
You will join the test meeting as an attendee.
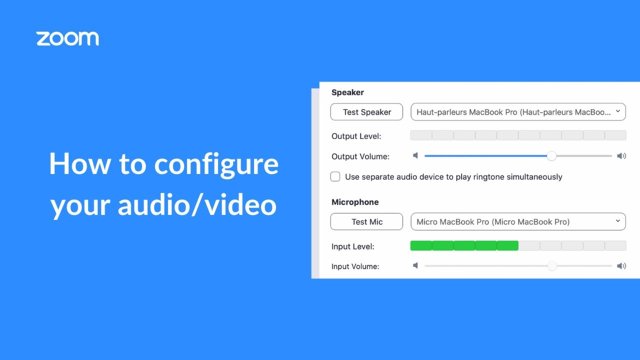
- Configure audio & video while in a meeting
To ensure the best quality Zoom meetings, it is important to maintain a high level of audio and video quality. This video will guide you through steps that can be taken to ensure the best sound and video. The following will be covered:
- Joining a Meeting With or Without Video
- Joining Zoom Audio in a Meeting
- How to Test Speaker and Microphone
- How to Start or Stop Video
- Adjusting Audio or Video on the Fly
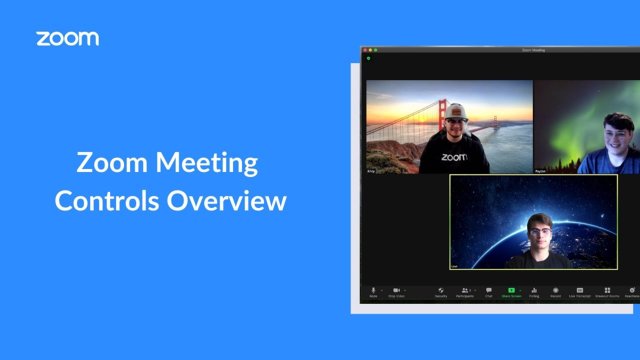
- Use the meeting controls
Zoom meetings have a variety of features and settings that can be accessed while in a meeting. This video covers each of these settings as well as their basic functions. The following will be covered:
- Mute/Unmute Function
- Start/Stop Video Function
- Invite Function
- Manage Participants
- Share Screen
- Chat
- Recording
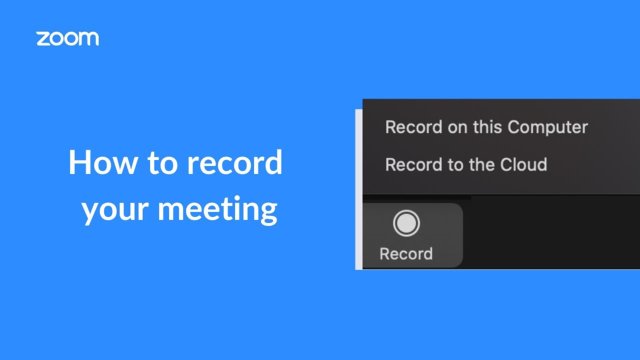
- Record a meeting
Zoom offers the ability for meetings to be recorded either via our cloud-based service or by recording meetings directly to your device. This video will cover the following:
- Local and Cloud Recording
- Recording Controls
- Recording Conversion and Locating Recordings
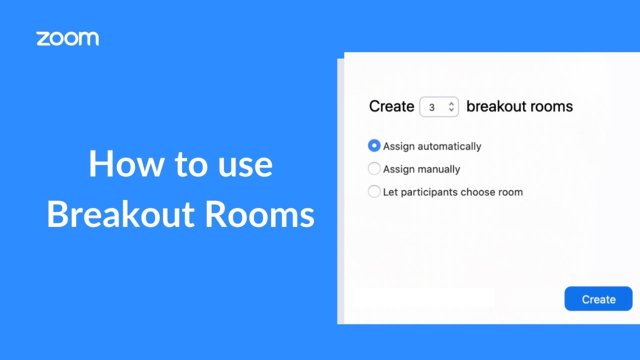
- Use breakout rooms
Breakout rooms allow you to split your Zoom meeting in up to 50 separate sessions. The meeting host or co-host can choose to split the participants of the meeting into these separate sessions automatically or manually, or they can allow participants to select and enter breakout sessions as they please. The host or co-host can switch between sessions at any time.
In the video below, the following will be covered:
- Enabling Breakout Rooms
- Starting Breakout Rooms
- Broadcasting A Message to all Rooms / Closing Rooms
- Additional Features
- Pre-Assigning Breakout Rooms
Visit this page for more information about managing breakout rooms in Zoom.
- Screen share & annotate
Zoom's Share Screen and Annotation feature comes with a wide variety of features. In this video, we will go over the features that come with 'Share Screen' and its useful tools with our 'Annotation' feature. The following will be covered:
- Basic: Share Screen (Desktop & Opened Windows/Applications)
- Share Computer & Optimize Screen Share for Video Clip
- Advanced: Share Screen (Portion of Screen)
- Files
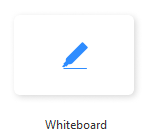
- Whiteboard
- Annotation (Toolbar: Draw, Text, Arrow, Stamp, Eraser, Format)
- Advanced Sharing Options

- Use the whiteboard & annotation tools
The whiteboard feature will allow you to share a whiteboard that you and other participants (if allowed) can annotate on.
Sharing a whiteboard
- Click Share Screen
 located in your meeting toolbar.
 - Click Whiteboard.
- Click Share.
- The annotation tools will appear automatically, but you can press the Whiteboard option in the meeting controls to show and hide them.
- Use the page controls in the bottom-right corner of the whiteboard to create new pages and switch between pages.

Note: Only the participant or host that started sharing the whiteboard has access to create and switch pages. - When you are done, click Stop Share.

Annotation tools
You will see these annotation tools:

Note: The Select, Spotlight, and Save options are only available if you started the shared screen or whiteboard.
- Mouse: Deactivate annotation tools and switch to your mouse pointer. This button is blue if annotation tools are deactivated.
- Select (only available if you started the shared screen or whiteboard): Select, move, or resize your annotations. To select several annotations at once, click and drag your mouse to display a selection area.
- Text: Insert text.
- Draw: Insert lines, arrows, and shapes.
Note: To highlight an area of the shared screen or whiteboard, select following square or circle icon to insert a semi-transparent square or circle.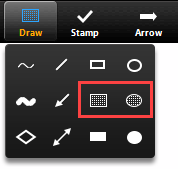
- Stamp: Insert predefined icons like a check mark or star.
- Spotlight / Arrow / Vanishing Pen: Turn your cursor into a spotlight or arrow.
- Spotlight (only available if you started the shared screen or whiteboard): Displays your mouse pointer to all participants when your mouse is within the area being shared. Use this to point out parts of the screen to other participants.
- Arrow: Displays a small arrow instead of your mouse pointer. Click to insert an arrow that displays your name. Each subsequent click will remove the previous arrow placed. You can use this feature to point out your annotations to other participants.

- Vanishing Pen (only available if you started the shared screen or whiteboard): Allows the presenter to annotate on the whiteboard or shared screen without having to erase or undo their last addition, as the annotation will fade away within a couple of seconds.
- Eraser: Click and drag to erase parts of your annotation.
- Format: Change the formatting options of annotations tools like color, line width, and font.
- Undo: Undo your latest annotation.
- Redo: Redo your latest annotation that you undid.
- Clear: Delete all annotations.
- Save: Save shared screen / whiteboard and annotations as a PNG or PDF. The files are saved to the local recording location.
Note: This option is only available to viewers if the host has allowed others to save.- To change the file format, click the downward arrow next to Save and select one of these options:
- PNG: Save as a PNG file. If there are multiple whiteboards, Zoom will save a PNG file for each whiteboard.
- PDF: Save as a PDF. If there are multiple whiteboards, Zoom will save a single PDF containing all whiteboards.
- To change the file format, click the downward arrow next to Save and select one of these options:
Annotation settings
If you started the shared screen or whiteboard, click More
 in the screen share controls for these annotation settings:
- Enable/Disable Annotation for Others: Allow or prevent the participants from annotating on your shared screen.
- Show/Hide Names of Annotators: Show or hide the participants' names when they are annotating. If set to show, the participant's name will briefly display beside their annotation.

- Click Share Screen
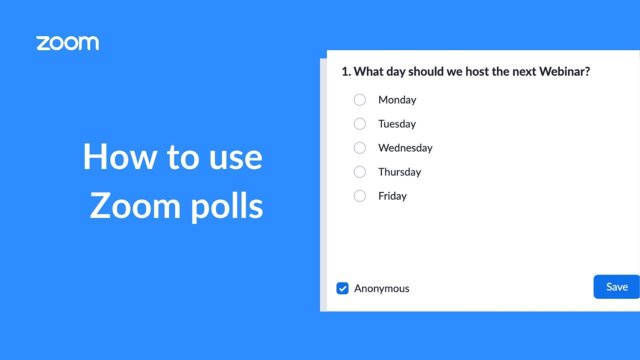
- Use polls
The polling feature for meetings allows you to create single choice or multiple choice polling questions for your meetings. You will be able to launch the poll during your meeting and gather the responses from your attendees. You also have the ability to download a report of polling after the meeting. Polls can also be conducted anonymously if you do not wish to collect participant information with the poll results.
This video will cover how to set up these polls. The following will be covered
- How to Access and Launch Polls
- Launching and Ending a Poll
- Ending Polls and Sharing Results
- Relaunching a Poll
- Creating Polls via the Web Portal
Visit this page for more information about using polls in meetings.
- Share and play a video
Sharing a video clip in your meeting or webinar is easier than ever with the built-in video player for shared content. Video files can be opened within Zoom’s built-in video player and shared, without other participants viewing the playback controls. Sharing your video with the built-in player, instead of as part of a shared screen or application, improves the quality of shared videos, providing a smoother and more stable viewing experience for your viewers.
Sharing your video
- Sign in to the Zoom desktop client.
- Start or join a Zoom meeting.
- Click Share Screen
 located in your meeting controls.
 - Switch to the Advanced tab, and then select Video

- Navigate to and select the video you wish to share, then click Open.
The video will now open within Zoom and be visible to attendees.
Notes:
- When using this feature, Optimize for video clip is automatically enabled, which is generally recommended for sharing videos but also restricts and downscales the resolution to 1080/720 to provide improved framerate. This can be manually disabled, which will allow for higher resolution, but this should only be used in situations where framerate is less important.
- You must be signed in to the desktop client to have this option.
Playback controls
While sharing the video, you will have some common playback controls, which are not visible to other meeting participants. The sharer will have the following controls:
- Play/Pause: Start or pause the playback of the video.
- Elapsed time/total video length: Shows the current elapsed time of video playback, and the total length of the video file.
- Playback slider: Allows you to skip to other points of the video playback range
- Volume: Allows you to adjust the volume of the video being shared.
- Fullscreen: Allows you to make the video full-screen for you and viewers.
Advantages of video share
When using the option to share your desktop or an application, the video resolution is dependent upon CPU usage, screen resolution, graphics card, and OS graphic system capabilities. Additionally, when a video is larger than 1080p, Zoom automatically downgrades the resolution to 1080p (or 720p), in order to optimize the content while minimizing the required bandwidth. Depending on how the video is shared, such as sharing a specific application or sharing only a portion of your screen, it may require additional CPU resources, which can further affect the overall quality of both the video share and the meeting for the user who is sharing.
However, when using the video share option, Zoom encodes the video from the file directly and shares it, effectively bypassing some of the limiting factors with standard content sharing. Allowing the Zoom client to handle the encoding and sharing minimizes CPU usage for the participant who is sharing, which allows for higher frame rates and smoother video playback.
- Raising hands & nonverbal feedback
Raising your hand
The raise hand feature allows students to raise their hand to indicate that they need something from the lecturer. As a lecturer, it may be helpful to inform your students how you would like to use this feature at the start of the lecture. For example, many hosts use this feature to know if an attendee has a question and would like to be unmuted to speak.
Nonverbal feedback & meeting reactions
If the meeting organizer enables the Nonverbal feedback and Meeting reactions features, students can place an icon in their video panel and beside their name in the participants panel to communicate with the lecturer and other students without disrupting the flow of the meeting. For example, selecting the Slow down icon places the icon in your video panel and beside your name to indicate you would like the host or presenter to go slower.
All students can see the icons that everyone else has chosen. In addition, the host sees a summary of how many participants are displaying each icon, and has the option to remove all nonverbal feedback.
Emoji reactions will disappear after 10 seconds, while raise hand and nonverbal feedback, such as Yes, No, Slow down, and Speed up, will be persistent and must be manually removed by the participant or host.
Managing nonverbal feedback and meeting reactions (hosts)
Nonverbal feedback and meeting reactions will be displayed in each participant's video panel, as well as next to their name in the participants panel. Click the Participants
 button to see a full list of participants and their nonverbal feedback and meeting reactions.
In the participants list, you can view and manage feedback using these features:
- If a participant clicked on a nonverbal feedback or meeting reaction icon, you'll see that icon beside their name.
- The number above each nonverbal feedback or meeting reaction icon shows how many participants have clicked on that icon.
- If a participant clicked Raise Hand, you can lower their hand by hovering over their name and clicking Lower Hand.

- To clear all nonverbal feedback at once, click Participants
 , then
  , then Clear All Feedback.
 - Emoji (meeting) reactions will disappear after 10 seconds, while raise hand and nonverbal feedback, such as Yes, No, Slow down, and Speed Up, will be persistent and must be manually removed by the participant or host.
Visit this page for more information about nonverbal feedback & meeting reactions.
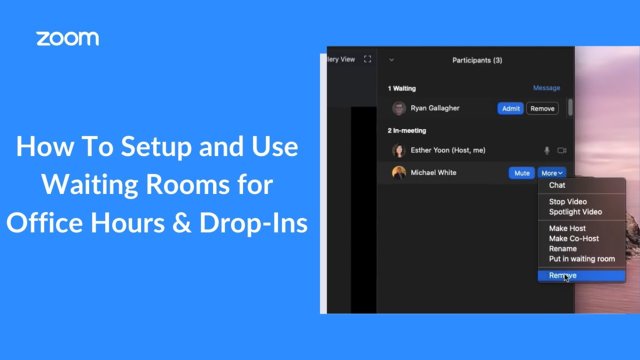
- Use the waiting room for drop-in meetings
Waiting Rooms is a Zoom Meeting feature that can be used to admit attendees into a pre-meeting room (separate from the main session) which can be used for a lot of different case scenarios. In this video, we will be using the Waiting Room feature for Office Hours 1:1 meetings & Drop-In meetings.
Training sessions
Contact
For more general information about Zoom, consult the Service Portal. For general questions about Zoom, please contact the Service desk ICT. For specific questions on how to use Zoom for educational purposes please contact your faculty’s E-Learning Specialist or the TELT team.